Views
How to view your plan in 3D, walk through it and render it
The 3D view shows the exact plan you are drawing, in real time. There is no separate model to build: walls, doors, windows, furniture, floors, stairs and roofs all appear as soon as you draw them, and anything you change in 2D shows up in 3D.
Use it to check heights and proportions, try light and finishes, save the angles you like, walk through the rooms in first person and turn a view into a realistic photo.
Open the 3D view and move around
Switch to 3D
Click 3D in the top bar, or View in 3D at the bottom of the left toolbar. A short loader builds your home, then the model appears. Click 2D to go back. Both views edit the same plan.
Orbit, pan and zoom
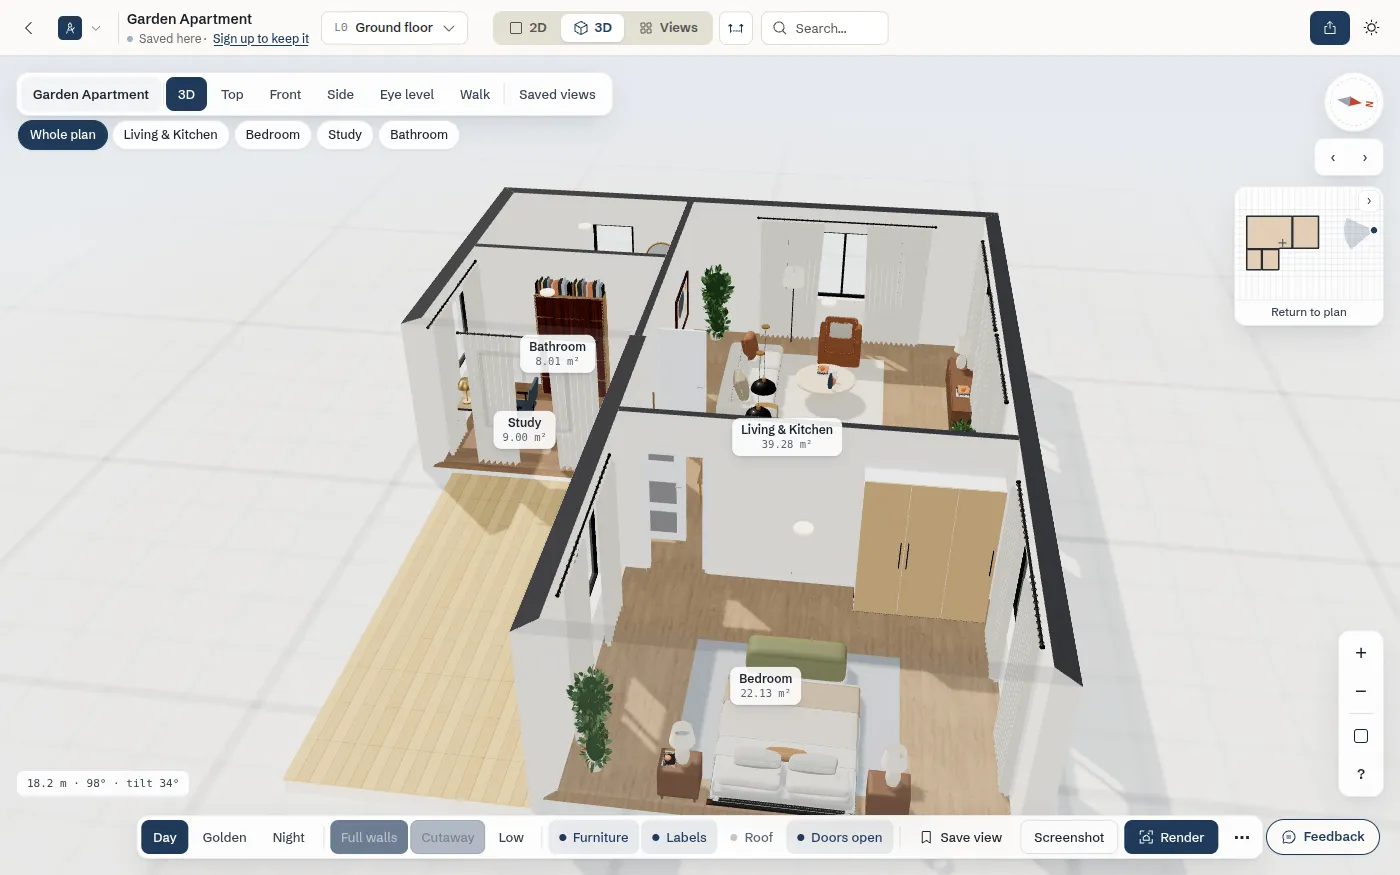
It works like the 2D canvas. With a mouse, drag to orbit, right-drag (or middle-drag) to pan and use the wheel to zoom toward the cursor. On a trackpad, two-finger scroll slides the plan, pinch zooms and Shift + scroll orbits. On a phone or tablet, drag with one finger to orbit, two fingers to pan and pinch to zoom. Double-click (or double-tap) a spot to fly to it.
Use the keyboard
W A S D or the arrow keys pan, Q and E rotate by 45 degrees, F fits the whole plan, + and - zoom, and 1 to 4 jump to the 3D, Top, Front and Side views. Eye level puts the camera at standing height.
Frame a room
Click a room chip under the view buttons to frame that room, or Whole plan to see everything again. On a plan with many rooms, the chips become a Room menu.
Find your way with the compass and mini-map
On the right, the N compass turns you to face north and the arrows rotate by 45 degrees. The mini-map shows where the camera is; click Return to plan if you lose the model. Click Hide map to fold the mini-map away and the tab to bring it back. The ? button opens the navigation guide, with the controls for mouse, trackpad and touch.
Switch floors
Press Alt+Up or Alt+Down for the floor above or below, also in 3D. The floor control in the top bar opens the floor menu with the Levels (show or hide each one), balconies and terraces, and the roofs.
Set the light and the look
The toolbar at the bottom holds the light, the wall style and what shows.
Pick Day, Golden or Night
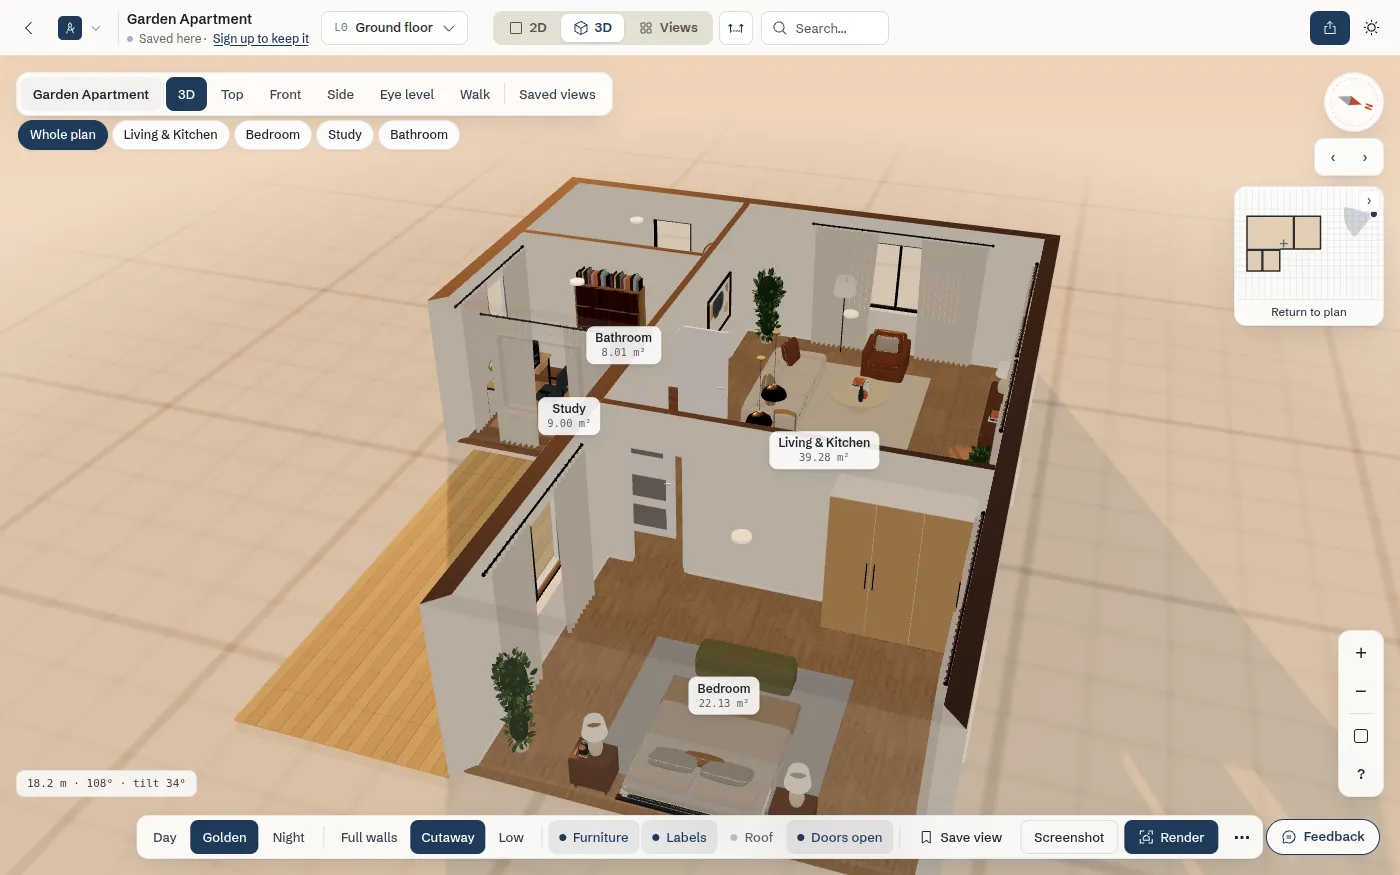
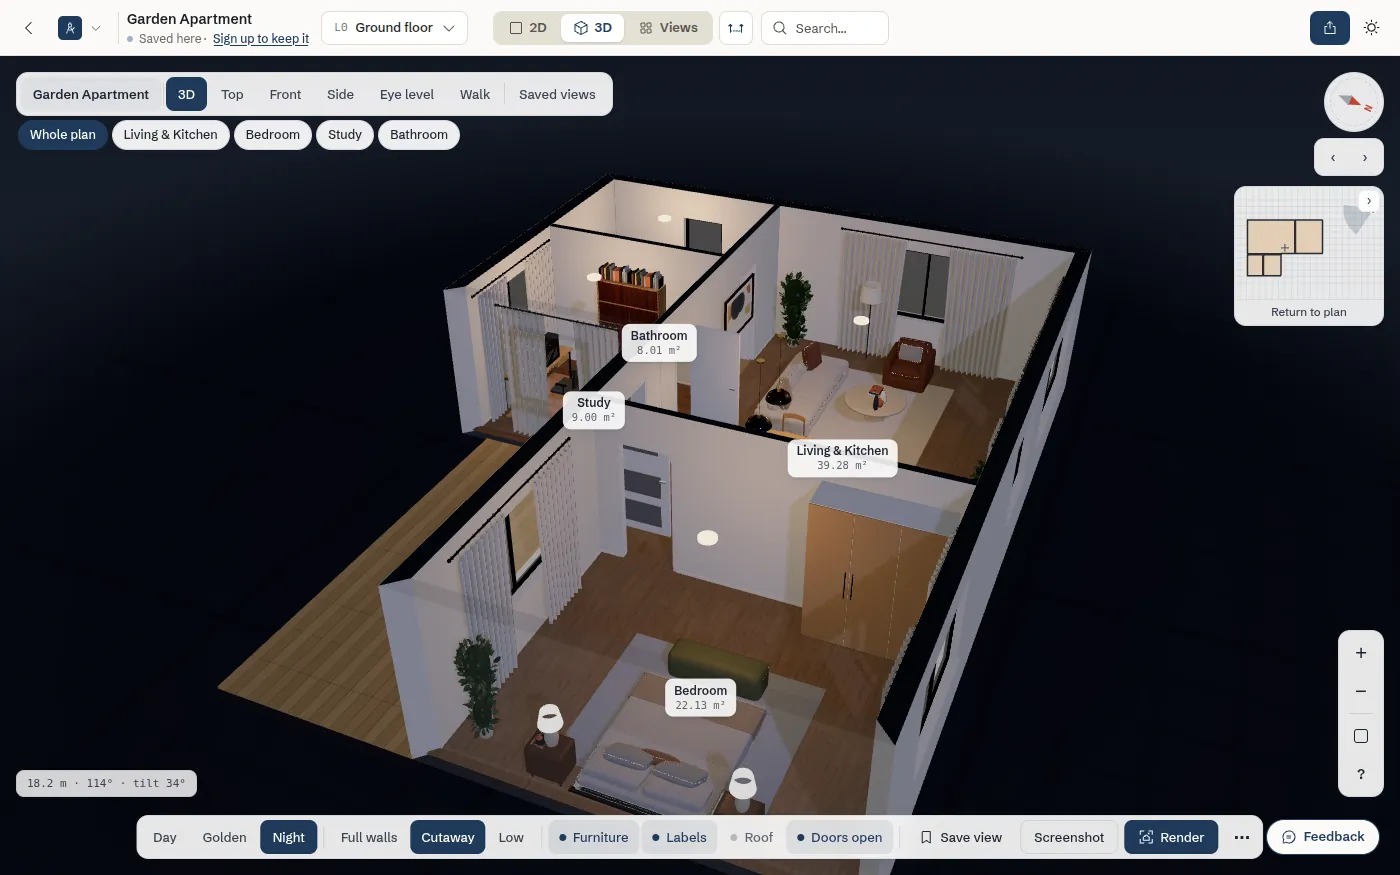
Day is bright, neutral daylight. Golden is a low, warm evening sun with long shadows. Night turns the outside dark and lights the rooms with warm lamps. Sunlight falls through your windows, so frames draw their shadows on the floor.
See it at night
Night is the best way to check how the rooms read with the lamps on. Switch back to Day any time; the choice is remembered on this device.
Choose what shows
Switch Furniture, room Labels, the Roof and Doors open on or off. With Doors open off, doors stay shut and open by themselves as you walk through.
Dark mode
The 3D view follows the editor theme. Switch the theme with the sun or moon button at the top right and the panels, toolbar and mini-map turn dark too.
Look inside: see-through walls and cutaway
Cut the walls down
In the toolbar, Full walls shows walls at full height, Cutaway fades the walls facing the camera and Low cuts every wall at 1.15 m like a plan. Switch Roof off to look into an upper floor from above.
Use See-through walls
Click the ... button at the right of the toolbar to open Settings. Under Show in 3D, See-through walls is on by default: the walls in front of the camera fade as you orbit, so you can always look into the rooms. Doors sets them Open or Closed, and Furniture & symbols hides or shows the furniture.
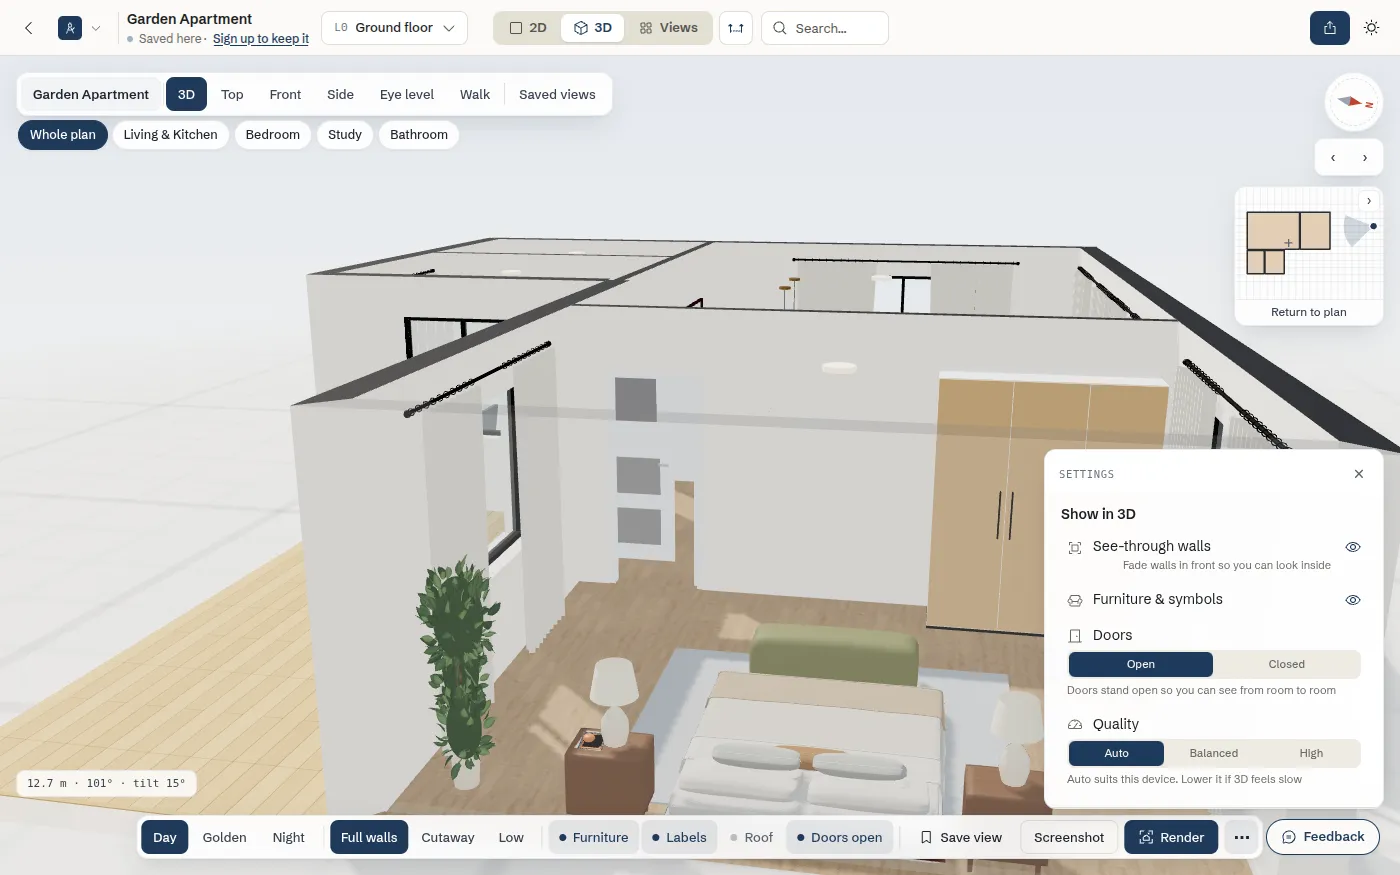
Know when they turn solid
A render or a saved view needs solid walls, so taking one switches See-through walls off for you and tells you so.
Edit things in 3D
Click something to edit it
Click a wall, a door or window, a piece of furniture or a room floor. A Selection card opens at the top left with its settings: a wall's length, clear height, thickness and paint for each face, a room floor's finish, or a piece's colour and material. Press Esc to close it.
Open or close one door
Select a door and click it again in the view to open or close it. With a door selected, the card also has Open all doors and Close all doors.
See the furniture as real 3D models
Furniture from the library shows as detailed 3D models, with your colours and materials on them. Plans made before the new models came out show a Legacy 3D switch next to the mini-map, to see the models they were made with.
Undo
Ctrl+Z and Ctrl+Shift+Z work in 3D too, for paint, finishes, slab and roof changes made there.
Save views and take screenshots
Save the current view
Frame a shot you like and click Save view in the toolbar. It is saved as View 1, View 2 and so on, with the camera position, the point it rotates around, the lens and the eye height. A plan keeps up to 20 saved views.
Go back to a saved view
Click Saved views at the top of the 3D view to open the list. Click a view to fly back to it, double-click its name to rename it, or delete it with its bin button. Save this view adds the current angle from here too.
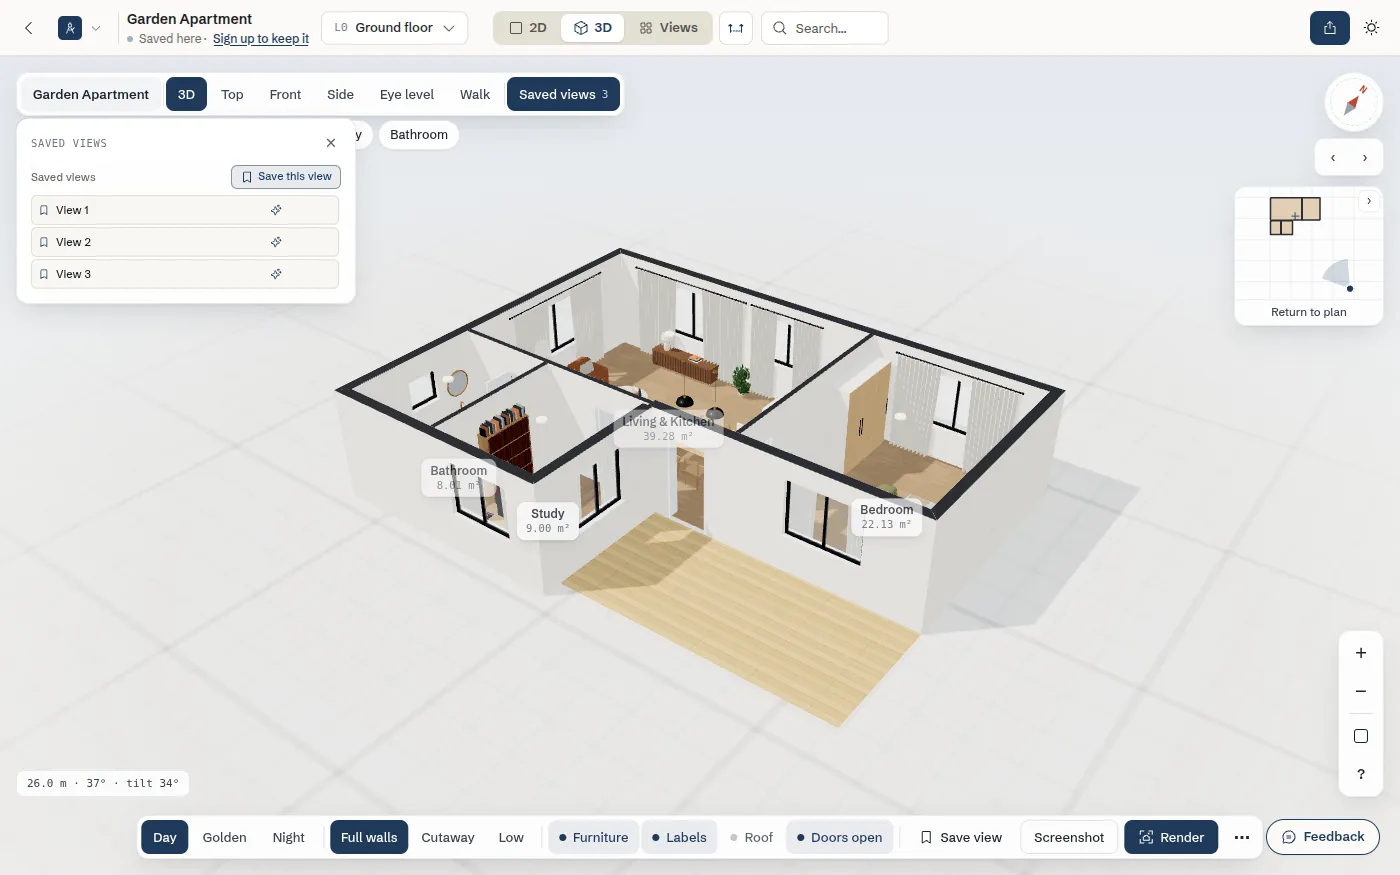
Take a screenshot
Click Screenshot in the toolbar. It saves a picture of the 3D view as you see it, without the panels and toolbar.
Walk through your plan
Start walk mode
Click Walk at the top of the 3D view. You start inside the selected room at eye height. The room chips under Exit walk take you to another room in one click.
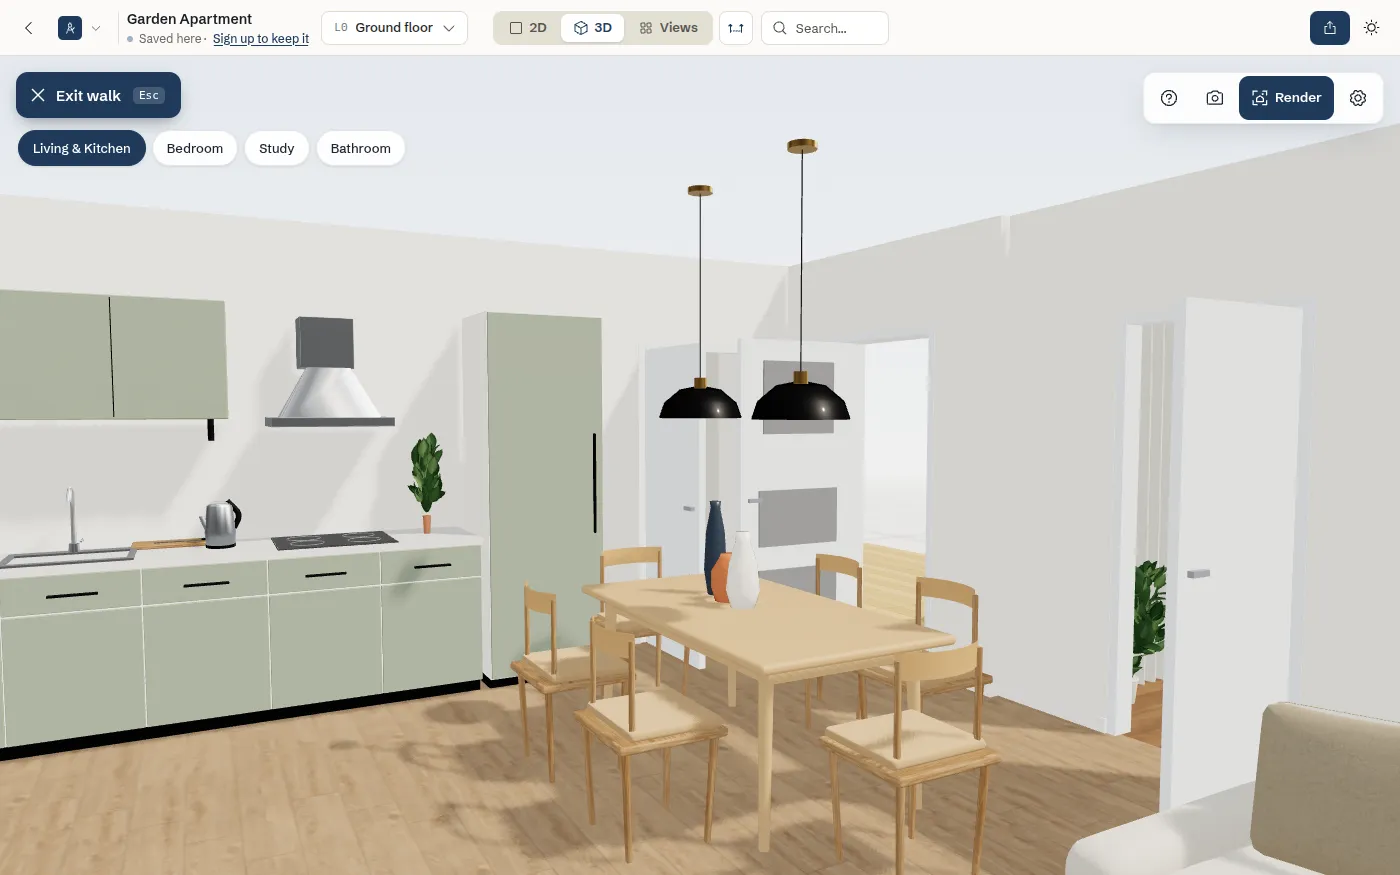
Walk on a computer
W A S D or the arrow keys walk, Q and E turn, drag to look around, scroll to step forward or back and double-click a spot to walk there. Hold Shift to walk briskly. Closed doors open as you walk up to them.
Walk on a phone or tablet
Drag the joystick at the bottom left to walk, drag anywhere else to look around, tap the floor to walk to that spot and pinch to step forward or back. A short card shows these the first time.
Take the stairs
Walk onto a stair to go up or down step by step, on straight, L-shaped, U-shaped and spiral stairs, and arrive on the floor above or below.
Walk through walls, or stop at them
By default walls and furniture do not block you: you walk straight through them, while floors and stairs still carry you, so you never fly or fall through a floor. To bump into walls and furniture like a real visitor, turn on Stop at walls and furniture in Walk settings or in the 3D Settings menu, or press G while walking. Doorways stay open and windows stay solid when it is on.
Change the walk settings
The gear button at the top right opens Walk settings: Walking speed, Person height, Field of view, Head bob (Off, Subtle or Natural), Stop at walls and furniture and Mouse look, which turns the camera as you move the mouse without dragging. Reset to defaults puts them back. The settings are remembered on this device.
Take a photo and stop
Press P or the camera button to save a picture of what you see. Click Exit walk at the top left or press Esc to stop; the 3D view comes back where you left it. With Mouse look on, the first Esc gives the pointer back.
Render a realistic photo
Realistic render turns the current 3D view into a photo-like image with real light and materials, up to 4K. You will find the Render button in the 3D toolbar. Taking a render needs a free account, and new accounts get 2 free credits to try it.
Frame the view and click Render
Frame the shot, then click Render at the right of the toolbar. You can also render from walk mode with the Render button at the top right, or render a saved view from the Saved views list. Rendering needs a free account.
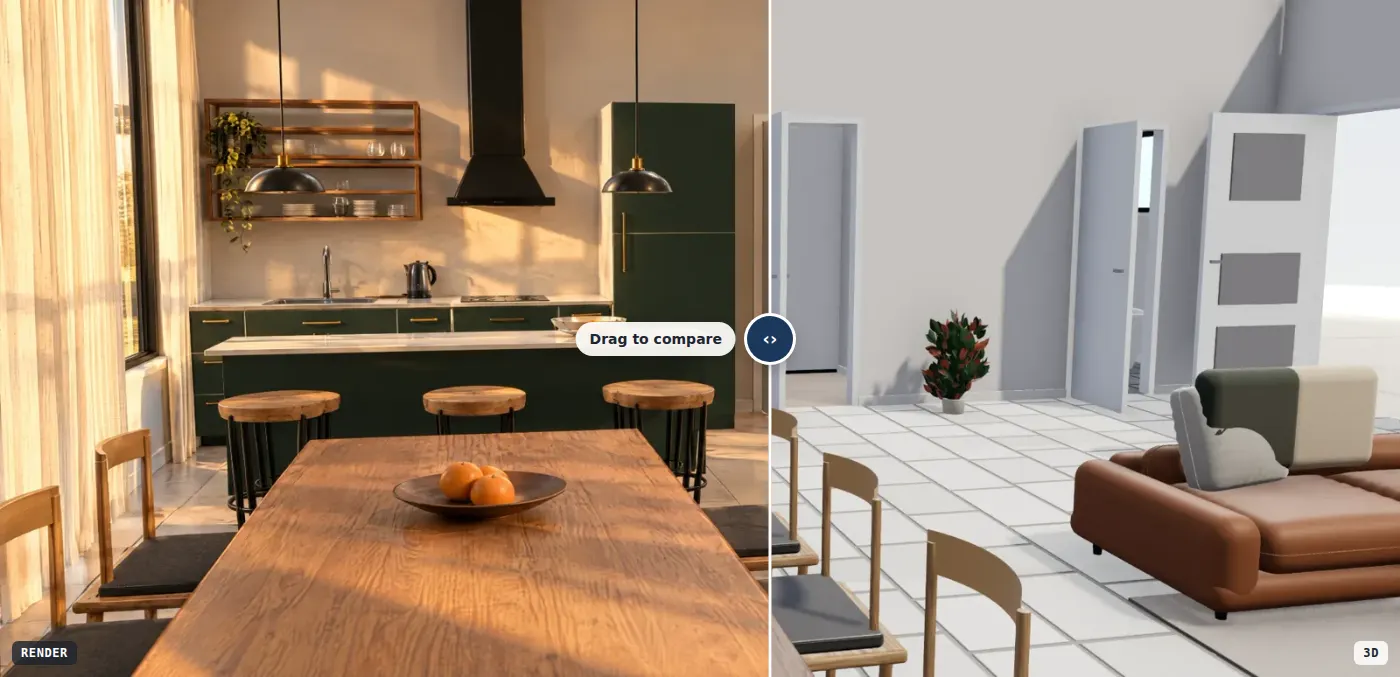
Pick the light, the scene and the quality
In Realistic render, choose the Light: Day, Golden hour or Night. Choose the Scene: Interior uses real light through your windows, Exterior keeps the cutaway look of your view. Then pick the Quality: Medium (1 credit, about 12 s, a quick look), High (2 credits, about 22 s, best for sharing) or 4K (4 credits, about 30 s, for print and big screens). Click Render photo.
Keep designing while it develops
The photo develops in the background. Click Keep designing and a chip above the toolbar tells you when Your photo is ready. Queue another view lines up the next one.
Compare, download or go back to the view
Drag the slider across the photo to compare the 3D view with the render; with the slider focused, the arrow keys move it, PageUp and PageDown move it by 10% and Home and End jump to either side. Download saves the photo, Render again makes a new one with the same settings, and Go to this view puts the 3D camera back where the photo was taken.
Find your photos in My renders
Open Settings (the ... button) and click My renders to see every photo of this plan, with Go to this view, Download and Delete on each.
Credits
Every account gets 2 free credits. Get more credits offers packs of 10, 30 or 100 credits; they never expire and work at any quality. If a render fails, the credit is refunded.
Tips
- If 3D is empty, switch to 2D and draw some walls or a lot first.
- Quality in Settings is on Auto, which picks the best setting for your device and steps down by itself when frames stay slow. Choose Balanced if 3D feels slow, or High for the sharpest shadows on a fast computer. Big plans also show distant furniture in less detail so they stay smooth.
- On a multi-floor project, a stair connected to the floor above shows as one continuous stairwell in 3D, and you can walk up it.
- Open or closed doors are a view setting only. Exports and the 3D model download always show doors closed.
- For a bright, clean picture of a room, try Cutaway with Day light, then click Save view so you can come back to the same angle.
- A render is an AI impression of your view, not a scaled drawing. Use the plan, elevations and exports for measurements.
Common problems
- The 3D view is empty
- Nothing is drawn yet. Switch to 2D and draw walls or a lot, then switch back to 3D.
- I cannot see inside the house
- Pick Cutaway or Low in the toolbar, switch Roof off, or check that See-through walls is on under Settings.
- Walk mode does not move
- Click inside the view first so it has the keyboard, then use W A S D or the arrow keys. If Mouse look is on, press Esc to get the pointer back.
- 3D is slow or jerky
- Open Settings and set Quality to Balanced. Auto already lowers it by itself when frames stay slow. Hiding Furniture also helps on older phones and laptops.
- Do I need an account to render?
- Yes. Rendering needs a free account, and new accounts get 2 free credits to try it. You can look around in 3D without one.
- The 3D view failed to load
- Refresh the page. Your plan is safe; you can switch back to 2D and keep editing. Older computers may need hardware acceleration turned on in the browser settings.
- My upper floor is missing in 3D
- Open the floor menu and check the Levels list: a level can be hidden in 3D. Adding floors needs a free account.
Related topics
- Finishes and materialsOne finish picker for floors, walls, stairs and furniture: pick a material or paint, then adjust scale, grain and tint.
- Furniture libraryFind furniture and fixtures in the library, place them at real size, then move, rotate, resize, lift or swap them.
- Floors & levelsAdd floors and basements, switch between them, and make each storey line up with the one below.
- StairsPlace a stair, shape it in the Stair configurator, give it finishes and connect it from one floor to another, up or down.
- RoofsStart a flat or pitched roof from your walls, or trace its outline, then pick the style, pitch and overhang.
- ElevationsSee every side of the building face on, move doors and windows on the facade, and print elevation sheets.
Planning a whole project?
Try it on a real plan
Free, in your browser. No sign-up needed to start.