Building features
How to make a sunken room or raised floor
A floor can sit higher or lower than the rest of its level. Use it for a sunken living room, a raised dining platform, a step down into a garage or a sunken bath.
You set the height on the floor itself, then add steps that are sized to the difference for you. The walls, doors and 3D view all follow.
Lower or raise a floor area
Give the area a floor
Press F and click inside the room. For only part of a room, Shift+click the first corner, click the other corners and close the shape on the first point. The height belongs to the floor, so the area needs one.
Select the floor
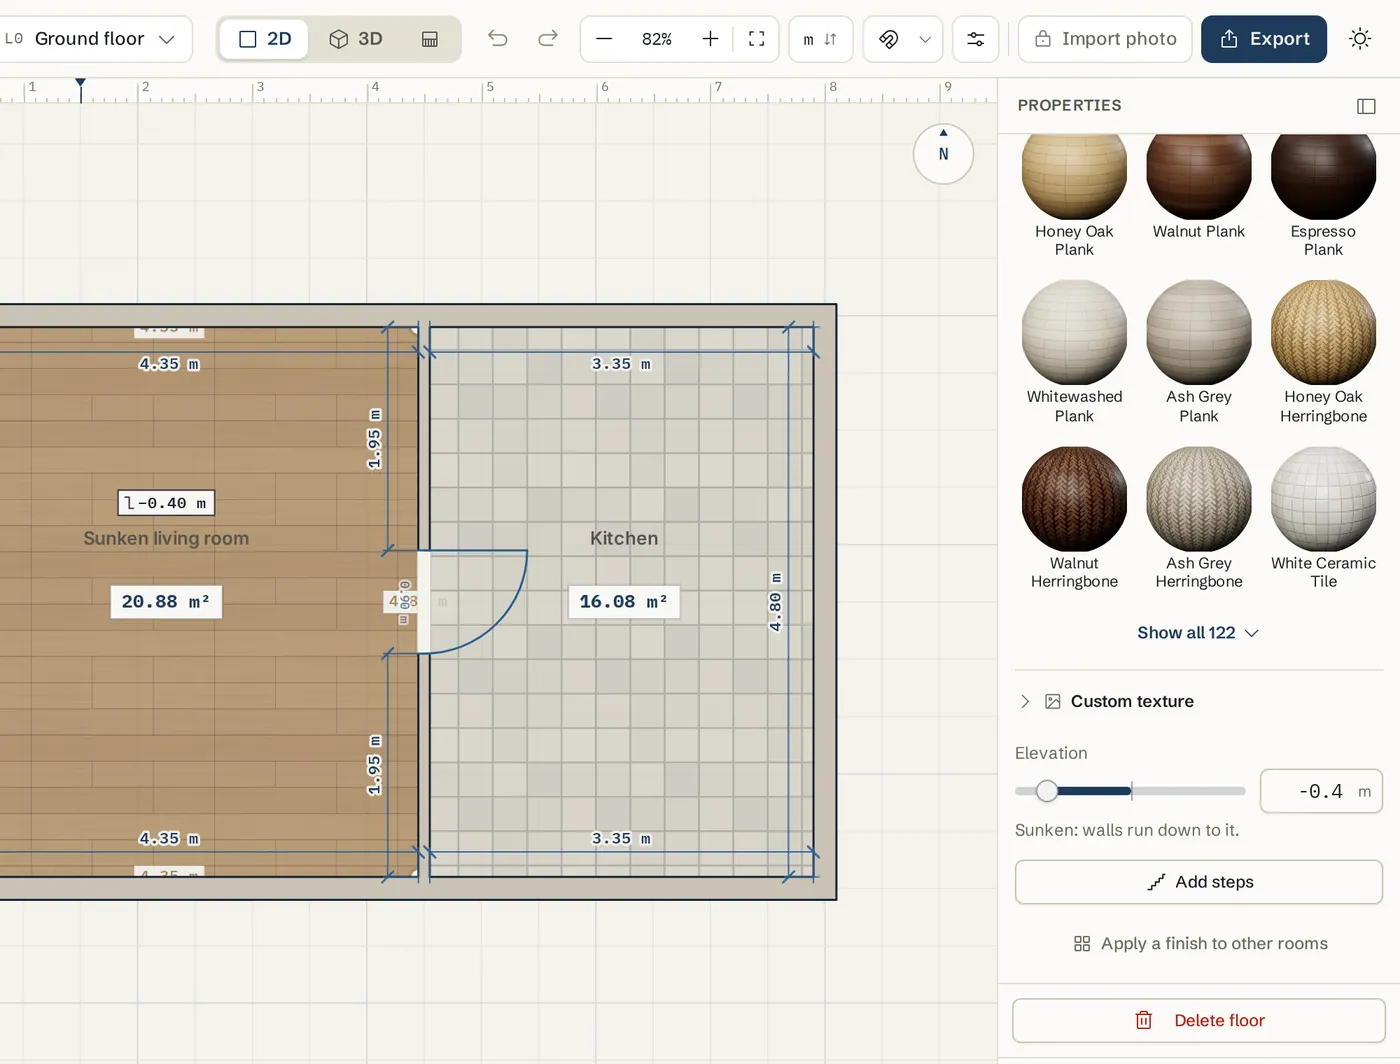
The new floor is already selected. Otherwise press V and click the floor. The Floor properties open on the right, and the Floor entry in the left toolbar (under Structure) opens its Elevation control too, showing the current value, for example +0.20 m. Both edit the same setting.
Drag the Elevation slider
Under Elevation, drag the slider left to sink the floor or right to raise it. It runs from -50 to +50 cm (-20" to +20" in an imperial plan) and snaps to 5 cm (2") steps. It clicks into 0 at the centre tick.
Hold Alt for fine steps
Hold Alt while you drag for 1 cm (half inch) steps.
Or type an exact value
Type a signed number in the box beside the slider, for example -15 for one step down or +10 for a platform, and press Enter. Typed values go up to 150 cm either way. In an imperial plan, type inches.
Read the hint
Under the slider, Sunken: walls run down to it. means the area is lower, Raised: a platform against the walls. means higher, and Flush with the floor line. means 0.
Set several areas at once
Box-select several floors, then drag the slider once. They all change together, as one undo step. If they differ, the box shows Mixed.
See it on the plan
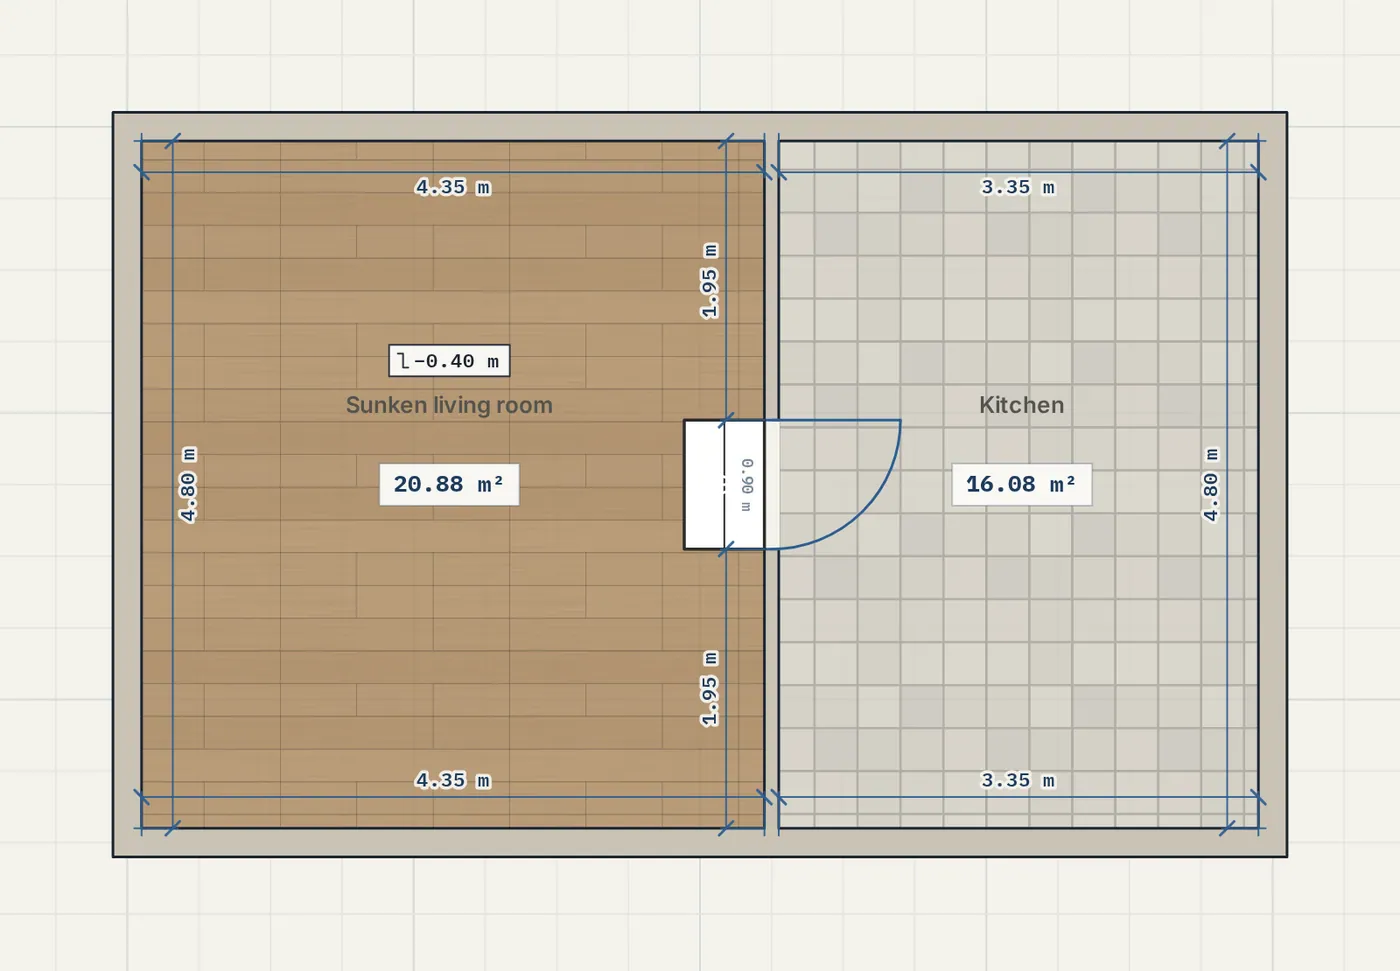
Where two floor heights meet, the plan draws a step line and a small tag by the room name, for example "-40 cm" or "+10 cm". It prints in exports too, also in black and white.
Add steps between the two heights
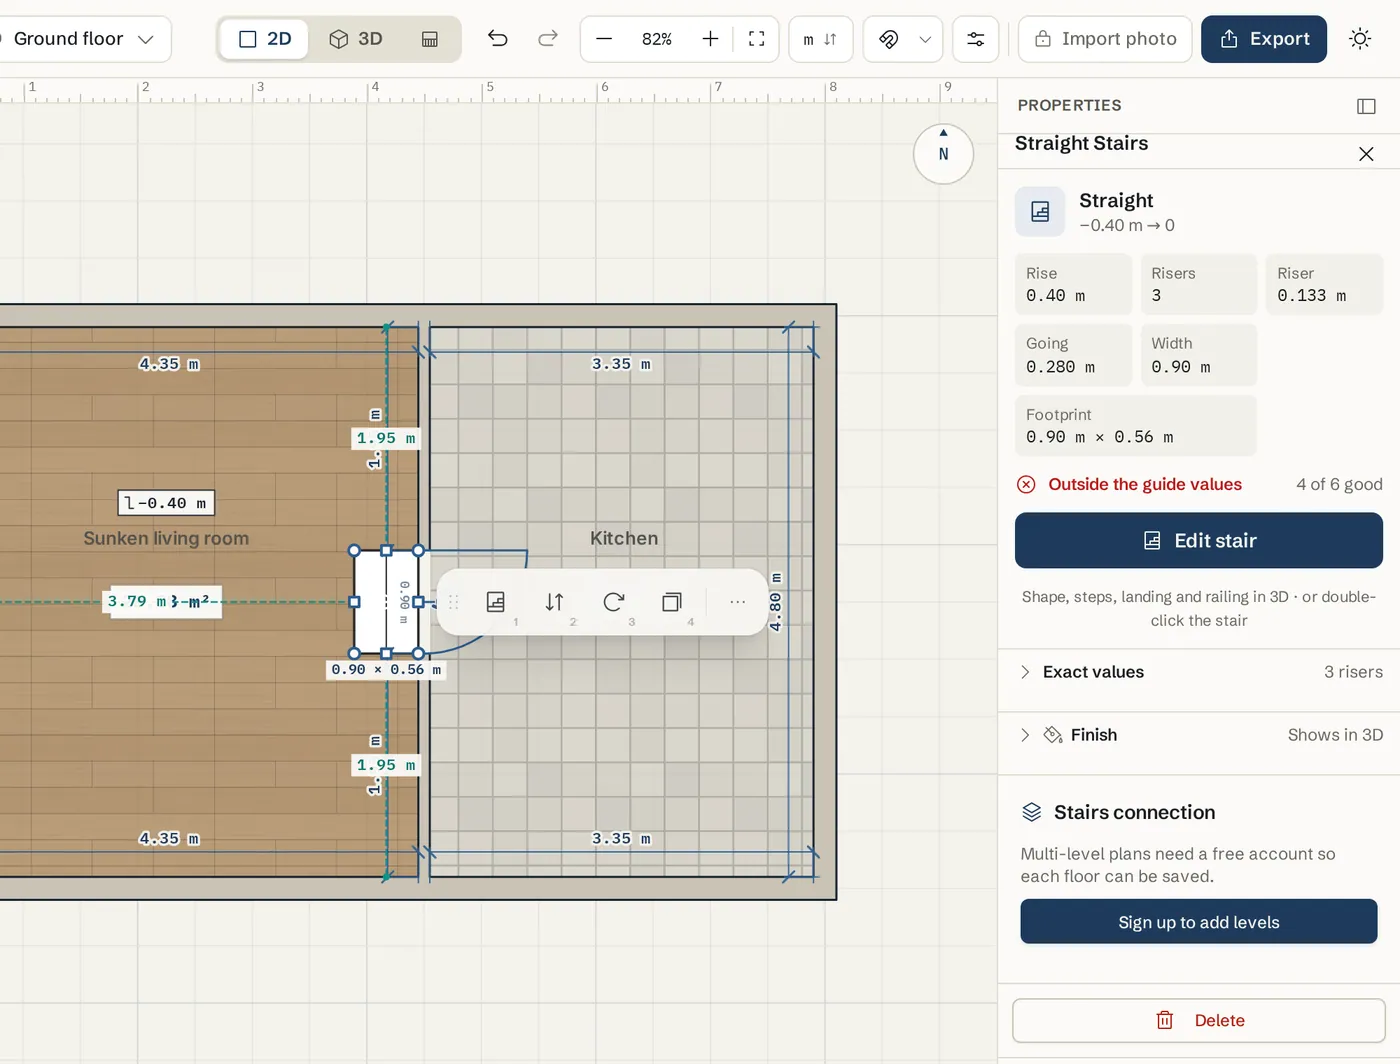
Click Add steps
Keep the raised or sunken floor selected. Click Add steps under the Elevation slider. It only shows when the elevation is not 0.
Check where the steps went
The flight goes at the doorway into the area, as wide as the doorway. With no doorway, it goes on the longest edge where the height changes, 90 cm wide. Steps sit inside a sunken area and outside a raised one, with the top edge flush with the upper floor.
Know how they are sized
Connecting steps rise exactly the height difference, with comfortable risers of about 17 cm and a 28 cm going, and no landing. A 40 cm drop gets 3 risers of 13.3 cm.
Or place a straight stair yourself
Press U, pick Straight and drop it with its head at the level-change edge. It snaps square to the edge and centres on a doorway, then sizes itself like connecting steps.
Fix a flight standing inside the area
If you placed a stair inside the area, its panel may ask Meant to step down into this room? or Meant to step up onto this area?. Click Make it connecting steps to turn it into a flight that fits the edge.
Read the stair base
Select the steps. The panel says, for example, Base: -40 cm (from floor area) · rises to 0. If you type a Base elevation or Floor-to-floor by hand, the stair switches to Heights set by hand. Click Match floors to follow the floor areas again.
Check it in 3D
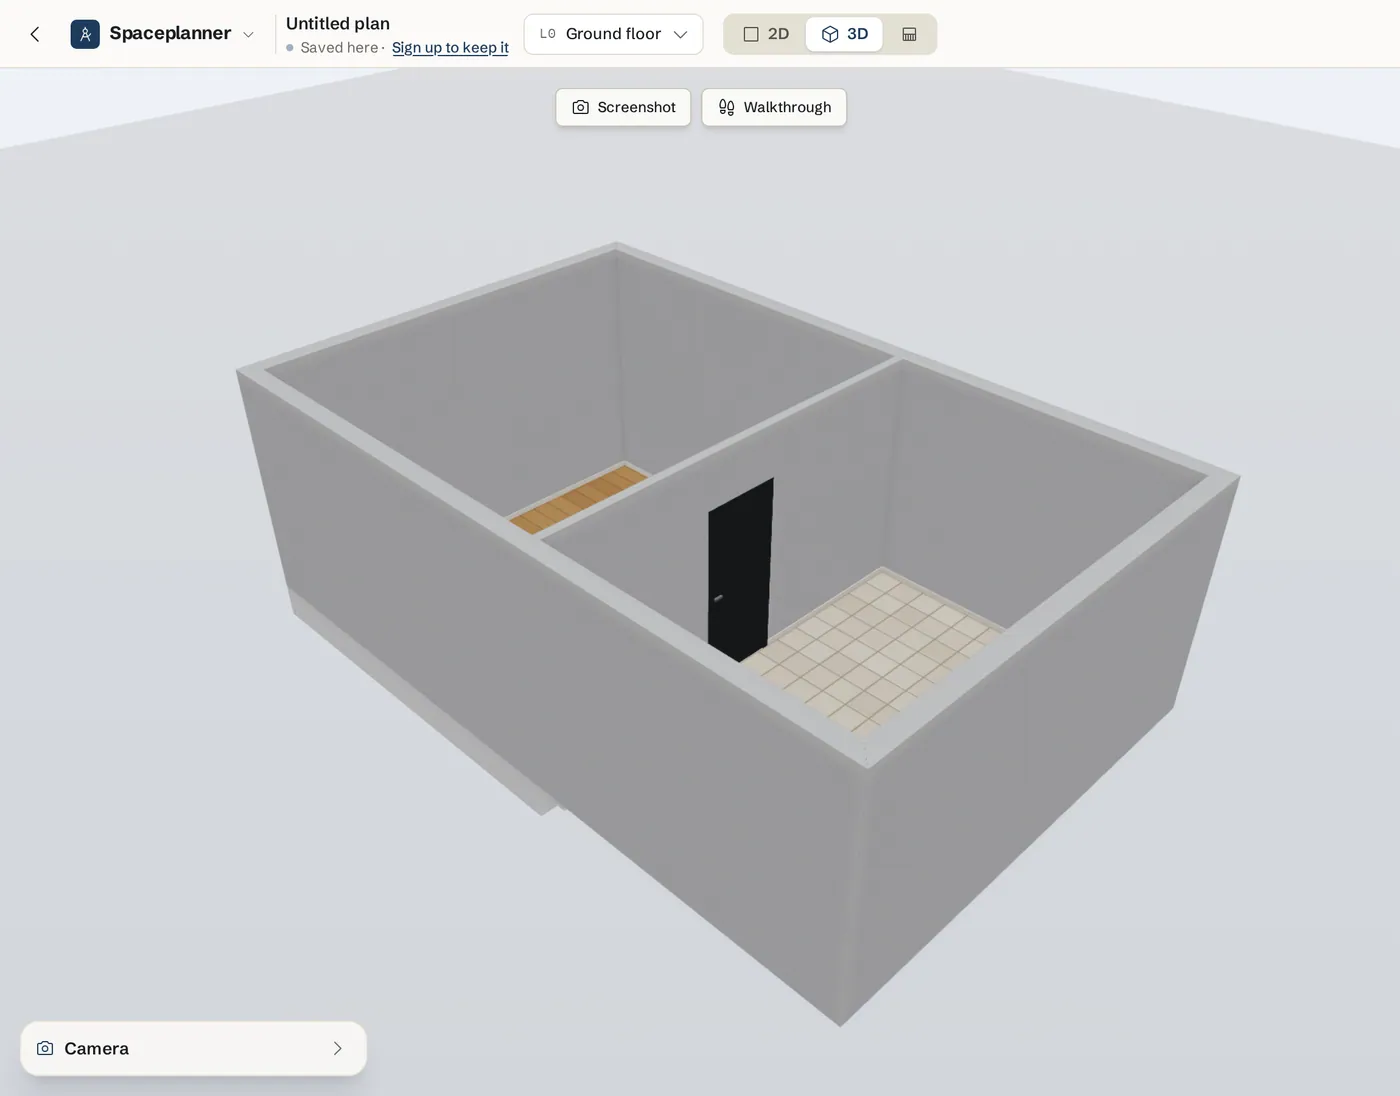
Switch to 3D. The floor sits at its height, a step face shows where it meets a floor at another height, and the walls around a sunken area run down to it with no gap.
Tips
- Walls keep starting at the level’s floor line. Around a sunken area they run down to meet it; a raised area is a platform that butts against the walls.
- Doors and windows keep their sill height from the level floor. A door into a sunken room gets a solid step under it.
- A full-height stair that starts on a sunken floor still reaches the level above, because its foot follows the floor it stands on.
- To raise the whole house above a sunken garage, box-select all the other floors and raise them together.
- For a real split-level house with separate storeys, use floors and levels instead, and stairs between them.
Common problems
- There is no Elevation slider
- The slider is on a floor. Give the area a floor with the Floor tool (F) first, then select that floor with V.
- The Add steps button is missing
- It only shows when the selected floor has an elevation other than 0. If you see No edge to put steps on, the area does not touch a floor at another height yet.
- The steps are too steep or too many
- The step count follows the height difference. A deep drop needs more risers. Change the elevation, or select the steps and click Edit stair to adjust them in the Stair configurator.
- My stair no longer reaches the upper floor after I sank the room
- Select the stair. If it shows Heights set by hand, click Match floors so it follows the floor it stands on and the level above.
- There is a gap under the walls in 3D
- Walls only run down to a sunken area. For a raised area there is no gap: it is a platform against the walls. Check the sign of the elevation value.
Related topics
- StairsPlace a stair, shape it in the Stair configurator, give it finishes and connect it from one floor to another, up or down.
- Finishes and materialsOne finish picker for floors, walls, stairs and furniture: pick a material or paint, then adjust scale, grain and tint.
- Floors & levelsAdd floors and basements, switch between them, and make each storey line up with the one below.
- RoomsDraw a whole room in one drag: rectangle, L-shape, round or any shape, at an exact size.
- 3D view & walkthroughSee the same plan in live 3D, light it, look inside, save views, walk through it and turn a view into a realistic photo.
Try it on a real plan
Free, in your browser. No sign-up needed to start.