Output
How to export and print your floor plan to scale
The Export dialog turns your plan into files you can print, send or open in other tools. It can export floor plans, building elevations, or both on one sheet.
Drawings print true to scale. At 1:100 an 8 m wall is 80 mm on the paper. PDFs are vector files: small, sharp at any zoom and crisp when printed.
Exporting needs a free account. If you are drawing as a guest, the Export button offers to create one, and your plan comes with you.
Open the Export dialog
Click Export
Click Export at the right end of the top bar. As a guest you first see a short sign up screen: create a free account and the Export dialog opens with your plan.
Read the preview
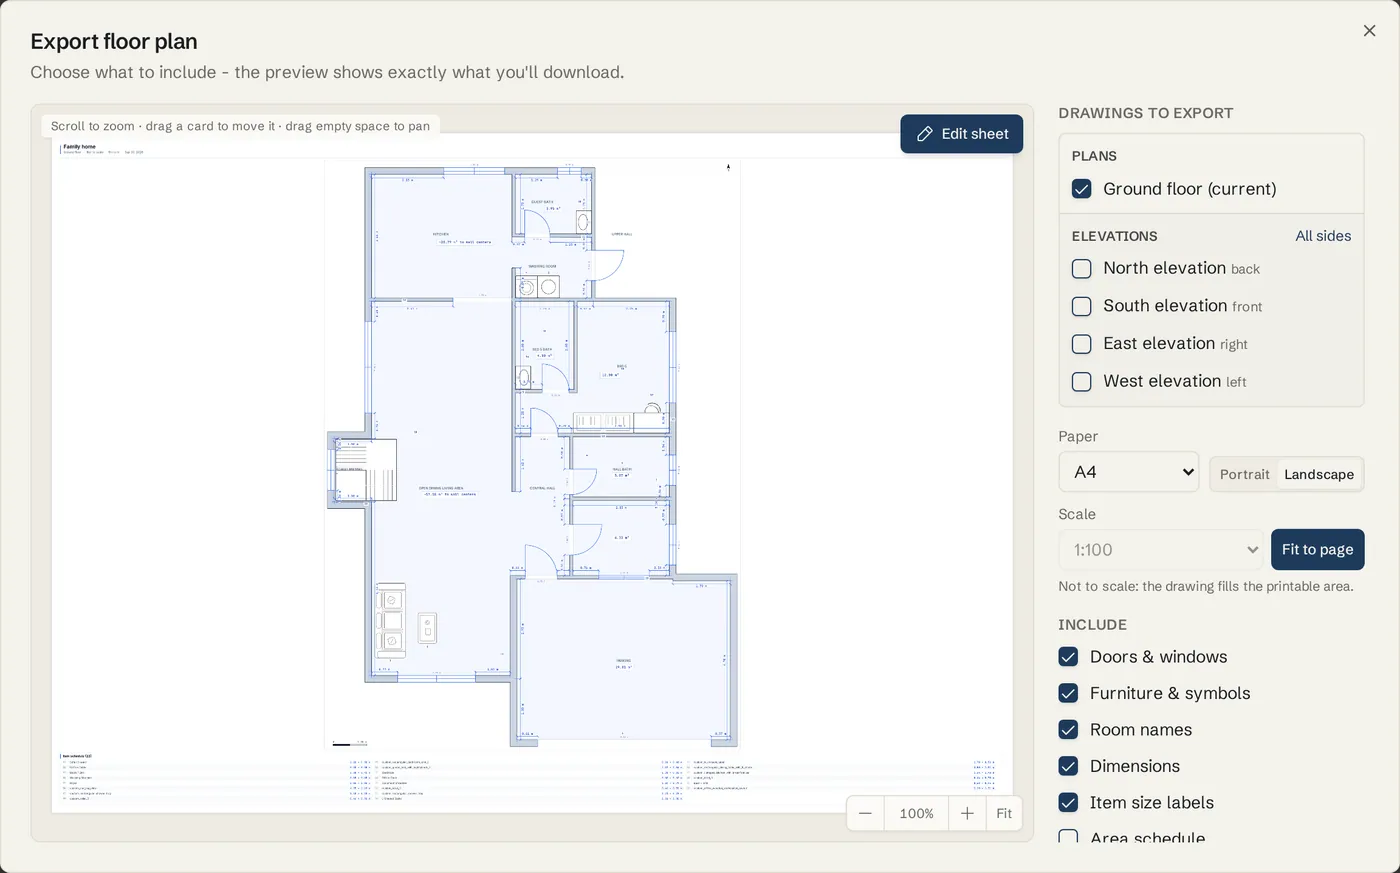
The big preview on the left is exactly what you will download. Scroll on it to zoom, drag empty space to pan, and click Fit to see the whole sheet again.
Choose what to export
Pick the plans
Under Drawings to export, the Plans group lists one plan per floor. Tick the floors you want. The quick link switches between Current only and All levels.
Add elevations
The Elevations group lists the four sides of the building: North, South, East and West. Tick the ones you want, or click All sides. They are drawn live from your plan, with every floor, the roof and every door and window.
Pick a layout for several drawings
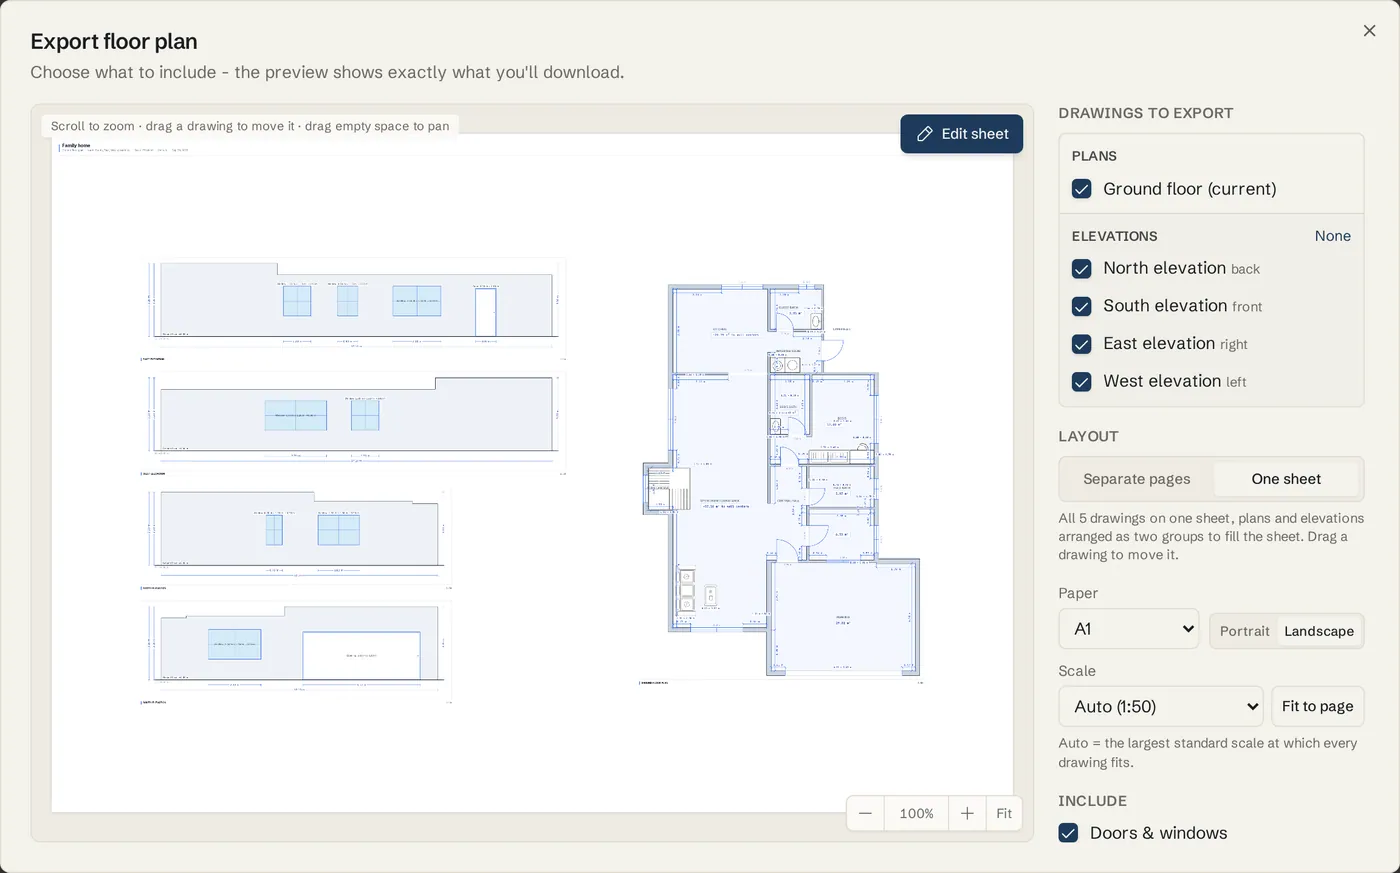
With more than one drawing ticked, choose the Layout. Separate pages gives one PDF page per drawing. One sheet puts every drawing on a single sheet, with the plans and the elevations arranged as two groups.
Set paper and scale
Choose the paper
Pick the Paper: A4, A3, A2, A1, A0, Letter or 16:9. Then pick Portrait or Landscape beside it.
Choose a true scale
Open Scale and pick a ratio from 1:10 to 1:1000, for example 1:50 for a room, 1:100 for a house or 1:200 for a site. The drawing is drawn at its real size on the paper. On one sheet, Auto picks the largest standard scale at which every drawing fits.
Or fit it to the page
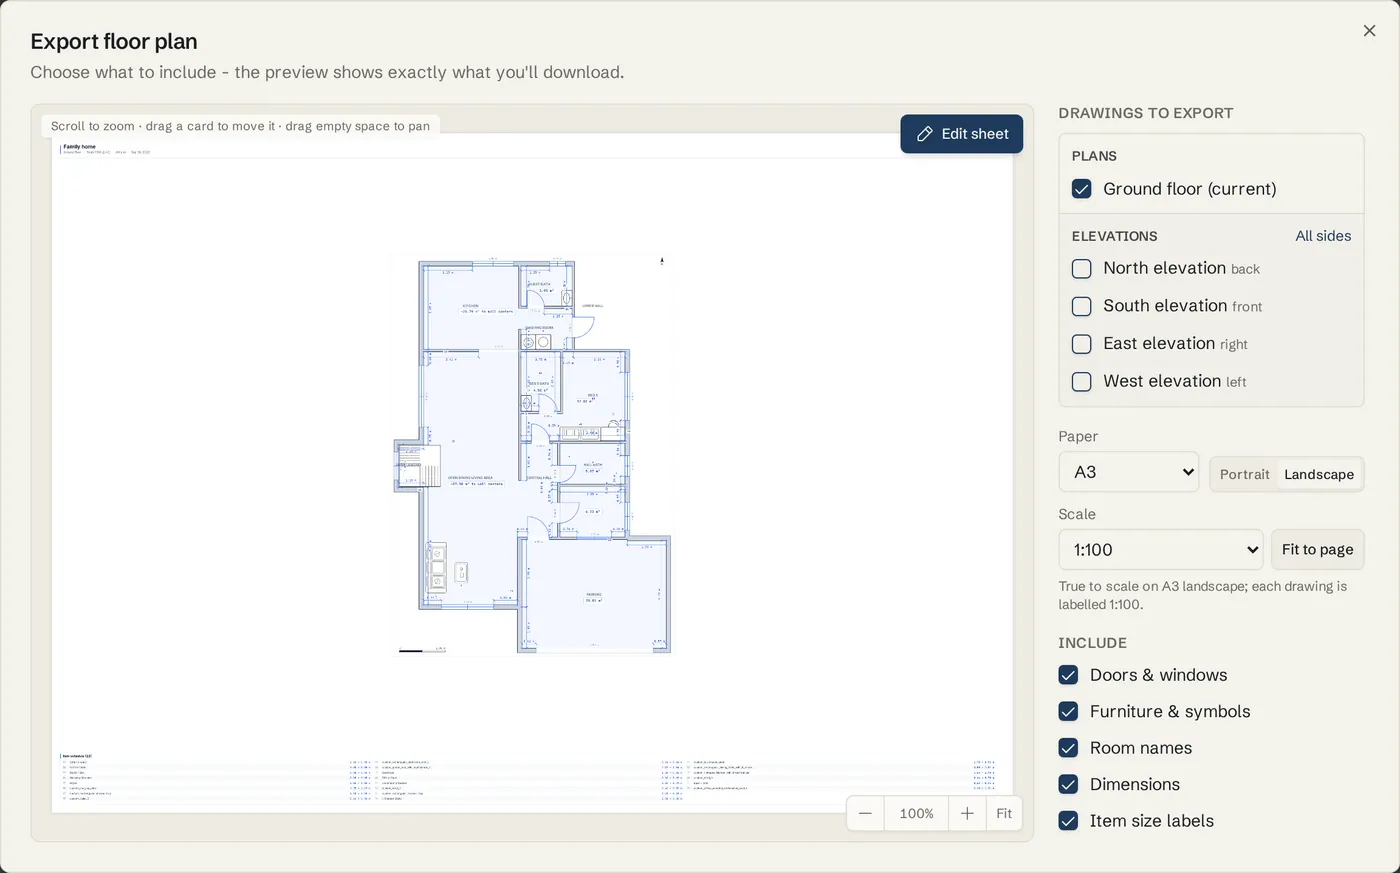
Click Fit to page instead when the size on paper does not matter. The drawing fills the printable area and the sheet says Not to scale.
Fix a drawing that does not fit
Your chosen scale is never changed for you. If the drawing is too big, a warning says so, for example Drawing does not fit on A4 landscape at 1:50, and the drawing is cropped. Click a quick button to fix it: Use A2 for a bigger sheet, Use 1:100 for a smaller scale, or Fit to page.
Choose what appears on the sheet
Tick the layers to include
Under Include, tick what should print: Doors & windows, Furniture & symbols, Room names, Dimensions, Item size labels, Room areas, Notes, Spacing guides, Electrical wiring, Roof outline, Opening labels, Window sill heights, Scale bar, North arrow and Grid lines. The north arrow follows the north angle you set on the plan.
Pick the measure type
With Dimensions ticked, the Measure type list sets which wall face the numbers describe: Inner face (room), Outer face (overall), Centerline or Both (inside + outside).
Add schedules
Tick Area schedule for a table of every room with its net area and the gross floor area. The sheet can also carry an Item schedule of furniture sizes and an Electrical legend. On a sheet these are cards you can move.
Print in black and white
Under Download as, tick Black & white (line drawing) for a colour-free drawing: black outlines on white, no room fills or textures. The preview updates, and the choice is remembered in this browser.
Arrange the sheet
On a sheet you can move drawings, resize frames and add your own text before you download.
Move a drawing
Drag a drawing on the preview to move it. It stays inside the margins and never overlaps another drawing.
Open Edit sheet
Click Edit sheet to get the full canvas and a toolbar. Click a drawing to select it, drag to move it, and drag the handles to resize its frame. The drawing keeps its scale; the frame crops it.
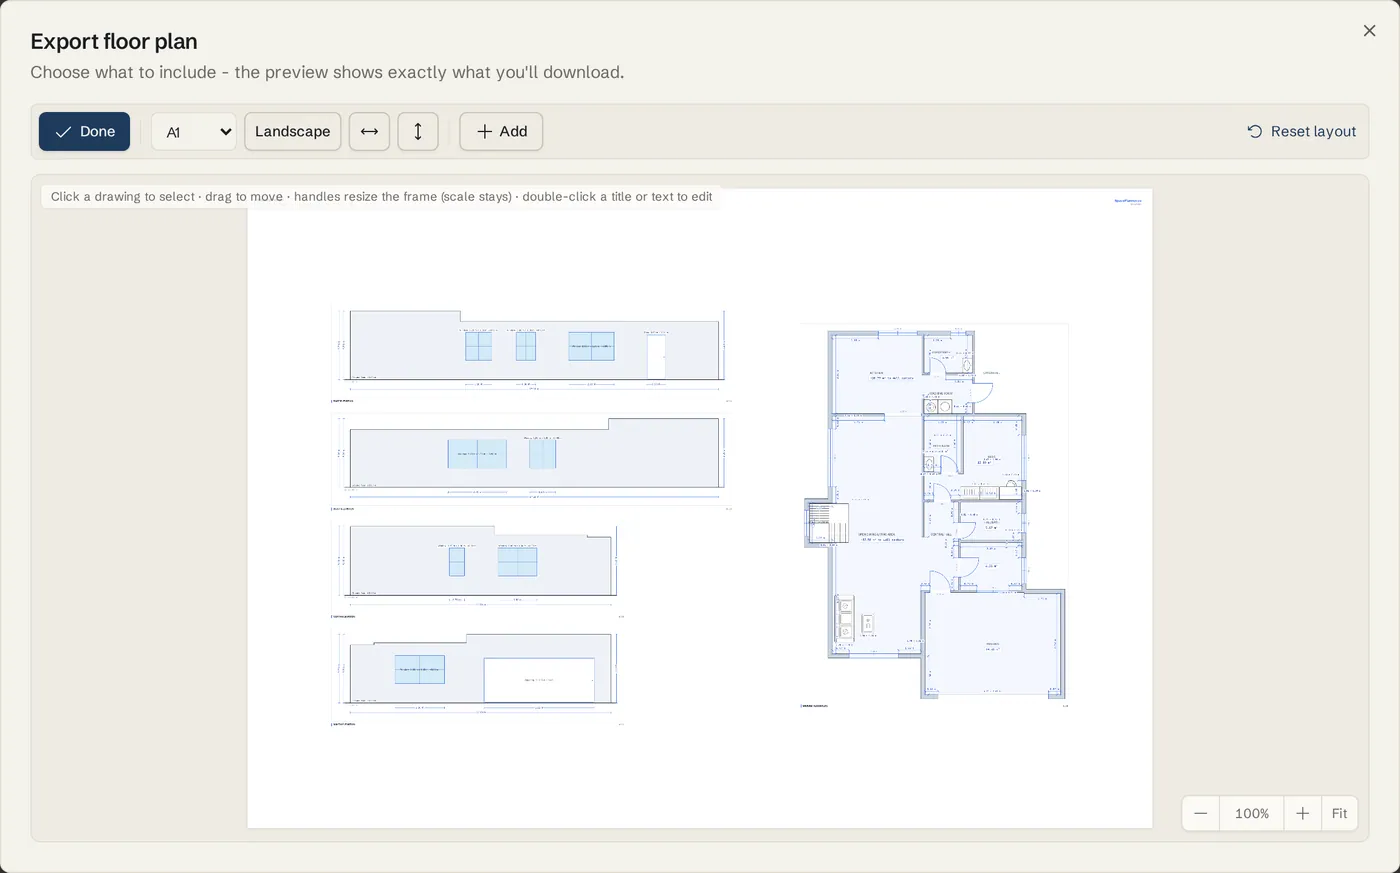
Give one drawing its own scale
With a drawing selected, pick its scale in the toolbar. It overrides the sheet scale and the frame resizes to fit. Fit frame fits the frame back around the drawing.
Add text
Click Add in the toolbar and choose Text, then click where the note goes. Divider adds a line. Text size is in printed points, so it reads the same on A4 or A0. Double-click a note to edit it, press Enter to save or Esc to cancel, and press Delete to remove it.
Rename a drawing on the sheet
Double-click a drawing title, or select it and click Rename drawing, then type a name such as Proposed First Floor. Only the sheet changes; your floor keeps its name. Default title brings the original back.
Start over
Click Reset layout to re-arrange every drawing automatically. Click Done to leave Edit sheet.
Download the file
Pick a format
Under Download as, click PDF (for printing), PNG (image), SVG (vector, sized in mm of paper) or DXF (editable CAD at 1:1, with layers, for AutoCAD, BricsCAD and other CAD software). The file saves to your downloads. DWG is coming soon.
Save a plan file
Click SpacePlanner plan file (.json) to save a complete copy of your plan to share or back up: every floor, every wall, door, piece of furniture, finish, dimension and setting. Anyone can open it in SpacePlanner with Import and gets the same plan.
Download a 3D model
Click 3D model (.glb) for the whole building as a 3D file you can open in Blender, SketchUp or any 3D tool. It needs walls, a lot or furniture on the plan first.
Get a copy by email
Leave Email me a copy ticked to receive the file in your inbox as well. Very detailed plans may send a lighter copy; the downloaded file is always complete.
Print at actual size
Open the PDF and print at 100% or Actual size, not Fit to page, or the printer rescales your drawing. To check, measure a known wall on paper: at 1:100 a 5 m wall is 50 mm.
Tips
- For a whole house, A3 at 1:100 usually fits one floor. Put two floors and four elevations on one A1 or A0 sheet.
- Separate pages is the easiest way to print several floors on a home printer: one A4 or A3 page per floor.
- The sheet settings and your layout are remembered in this browser, so the next export starts where you left off.
- Elevations are drawn from the live plan, so change a window on the plan and export again to see it on every side.
- Layer toggles that only apply to plans (furniture, room names, electrical) hide when only elevations are ticked.
- The share link at the bottom of the dialog is a quick way to send someone an editable copy instead of a file.
Common problems
- The printed plan is the wrong size
- Your printer is scaling the page. In the print dialog choose 100% or Actual size, and make sure the paper in the printer matches the Paper you picked in Export.
- Export asks me to sign up
- Downloading files needs a free account. Sign up from the Export prompt; your plan moves into your account and the Export dialog opens.
- The drawing is cut off
- At that scale the drawing does not fit the paper. Use the quick buttons under the warning: a bigger paper such as Use A2, a smaller scale such as Use 1:100, or Fit to page.
- The PDF says Not to scale
- Fit to page is on. Pick a ratio in Scale to print true to scale again.
- No elevations are listed
- Elevations need walls. Draw the outside walls of the building and the North, South, East and West elevations appear under Elevations.
- The dimensions show the wrong face of the wall
- Change Measure type under Dimensions: Inner face (room) for room sizes, Outer face (overall) for the footprint.
- The 3D model button is greyed out
- There is nothing to build in 3D yet. Draw walls, a lot or add furniture first.
Related topics
- ElevationsSee every side of the building face on, move doors and windows on the facade, and print elevation sheets.
- Areas & area scheduleNet room areas, gross floor area per floor and building totals, on the plan, in the Areas panel and in exports.
- Dimensions & measuringWall lengths on the plan, which face they measure, typing a length, and extra dimension lines.
- LayersHide or show furniture, dimensions, areas, wiring, the roof, reference images and the grid.
- Sharing and collaborationSend a link that opens an editable copy, or share an exported PDF or image.
- Saving and your accountGuest plans save in your browser; a free account keeps every plan, with version history.
Planning a whole project?
Try it on a real plan
Free, in your browser. No sign-up needed to start.