Drawing
How to draw rooms
The Room tool draws all the walls of a room at once. It is the fastest way to start a plan: drag a box and you have four walls, a closed room and its area.
Pick the shape you need: Rectangle, L-shape, Any shape (click the corners) or Round. Every room uses the thickness and height set in Wall settings.
Draw a rectangle room
Turn on the Room tool
Press R, or click Room in the left toolbar under Structure. The label beside it shows the shape it will draw, for example Rectangle.
Drag a box
Press where one corner goes and drag to the opposite corner. Let go to place the four walls.
Type the size while you drag
While you are still dragging, type the width and depth, for example 400x300, and press Enter. The room is exactly that size.
Or use Exact size, with no dragging
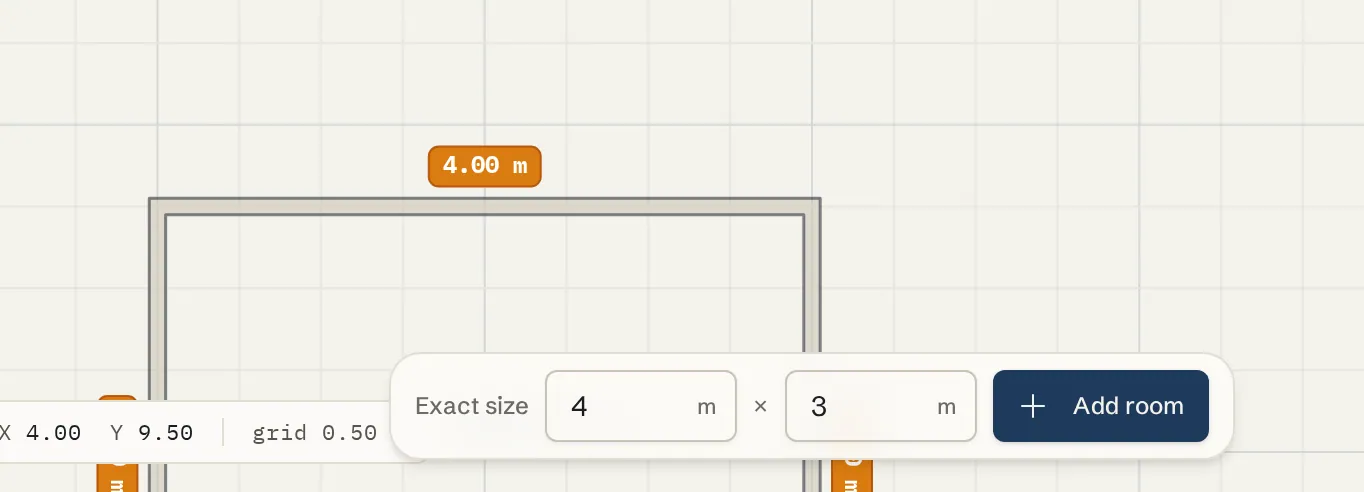
While the Rectangle tool is on, a bar at the bottom of the plan shows Exact size. Type the width and depth and click Add room. The room is placed clear of your other rooms.

Draw L-shaped, round and any-shape rooms
Open the shape chooser
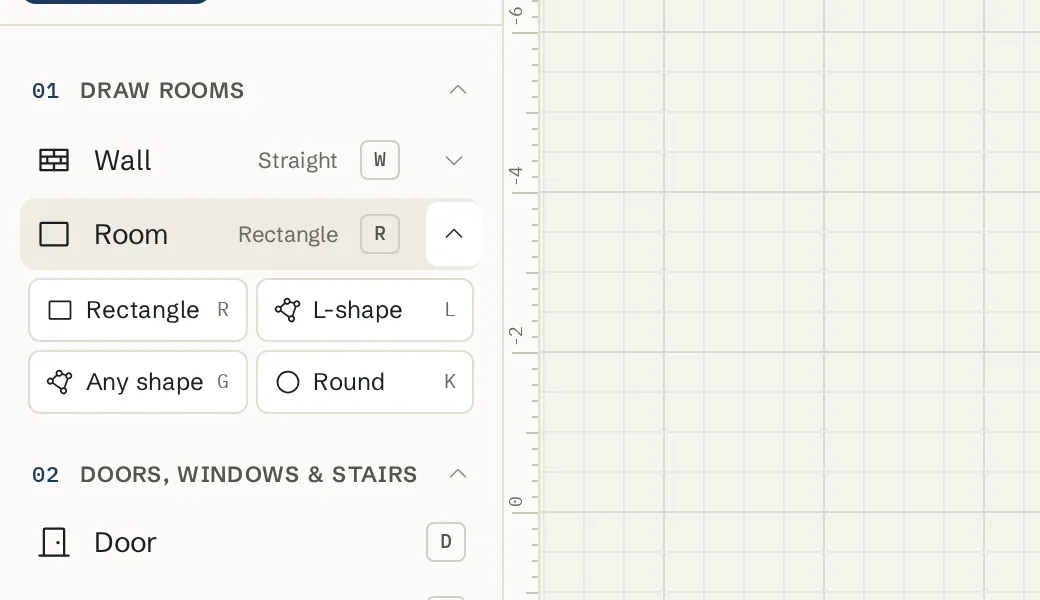
Click the small arrow next to Room in the left toolbar. Pick Rectangle (R), L-shape (L), Any shape (G) or Round (K). The tool remembers the last shape you used.
L-shape
Drag a box like a rectangle. The tool draws an L inside it. Select the room afterwards and drag its corners to adjust the notch.
Any shape
Click each corner in turn. Click the first point again, or double-click, to close the room. Esc cancels.
Round
Press at the centre and drag out. Type a radius while dragging, for example 250, and press Enter. The bar at the bottom also has a Radius field and Add room.
See and name each room
Read the area
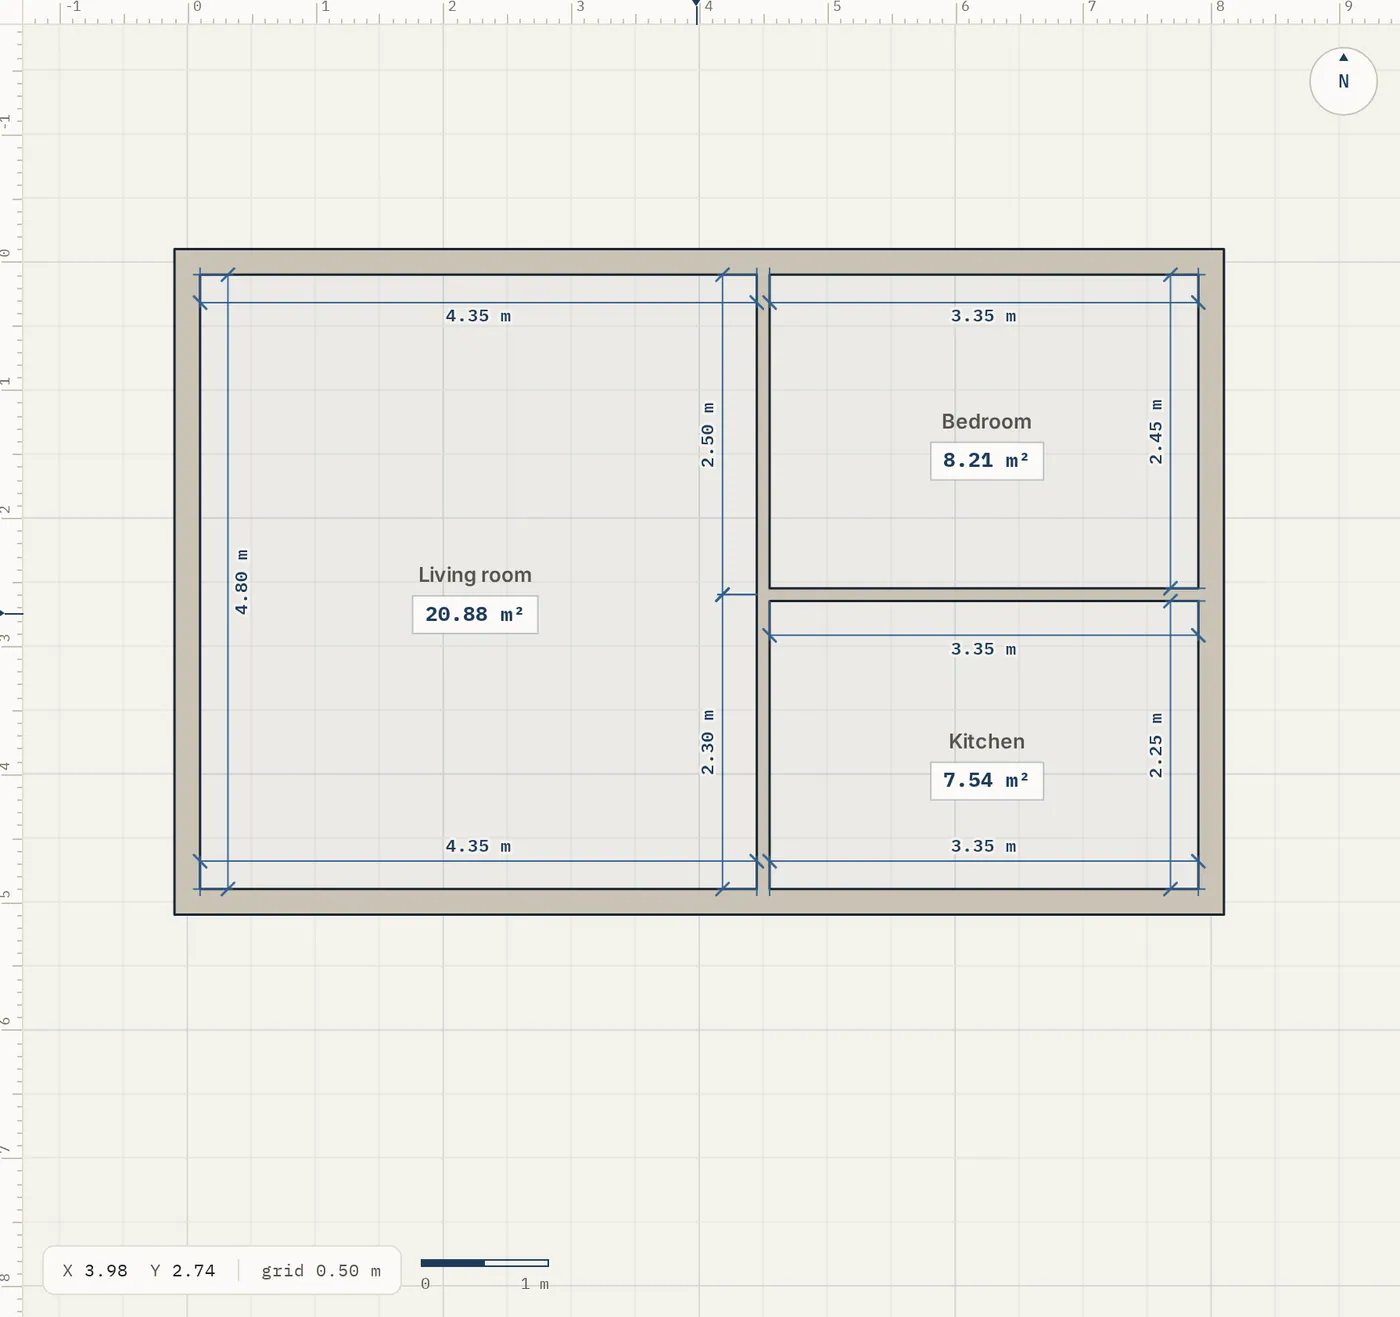
Every space closed in by walls is a room. Its area shows in a chip in the middle, in m² or ft² to match your units.
Split a room with a wall
Draw a wall across a room with W. Where walls cross or meet in a T, the room splits in two and each part gets its own area.
Name the room
Click Room label in the left toolbar under Measure & label, then click inside the room. Type a name such as Kitchen in Room name. See Labels and text.
Tips
- Set Wall settings first. All walls of a new room use its thickness and height.
- A new room is selected right after you draw it, ready to move or edit.
- Each room is a set of ordinary walls. Select any of them to change its length, thickness or height.
- The Areas panel on the right (under Layers) lists every room with its area. See Area schedule.
Common problems
- My room has no area
- The walls do not fully close. Look for a small gap at a corner and drag the wall end until the badge says End.
- The area says "to wall centers"
- Your plan uses the Centre corner join, so the area is measured to the middle of the walls. Switch Corner join to Inside or Outside in Settings under Advanced for areas inside the wall faces.
- Typing 12 made a 12 foot room, not 12 inches
- In Feet & Inches a bare number is feet. Type 5 6 for 5 feet 6 inches, or add the unit: 66in.
Related topics
- WallsDraw straight walls corner to corner, type exact lengths, and set thickness, height and corner join.
- Curved wallsDraw a curved wall, set its radius, or bend a straight wall you already drew.
- Labels, notes & areasName rooms, style their labels, add notes with a leader line, and outline an area to measure it.
- Areas & area scheduleNet room areas, gross floor area per floor and building totals, on the plan, in the Areas panel and in exports.
- Units (cm, m, ft-in)Choose metric or imperial units for the whole plan and type lengths in any format.
- Dimensions & measuringWall lengths on the plan, which face they measure, typing a length, and extra dimension lines.
Planning a whole project?
Try it on a real plan
Free, in your browser. No sign-up needed to start.