Basics
How to select, move, group, align and lock things
Almost every edit starts with a selection. The Select tool picks walls, doors, windows, furniture, room labels, floors, dimensions, measurements and notes.
Selecting works like a CAD program: the direction you drag a box decides what it picks up. Once several things are selected they move, copy and delete as one.
Select one item
Switch to the Select tool
Press V or click Select at the top of the left toolbar. Esc also clears the current selection.
Click the item
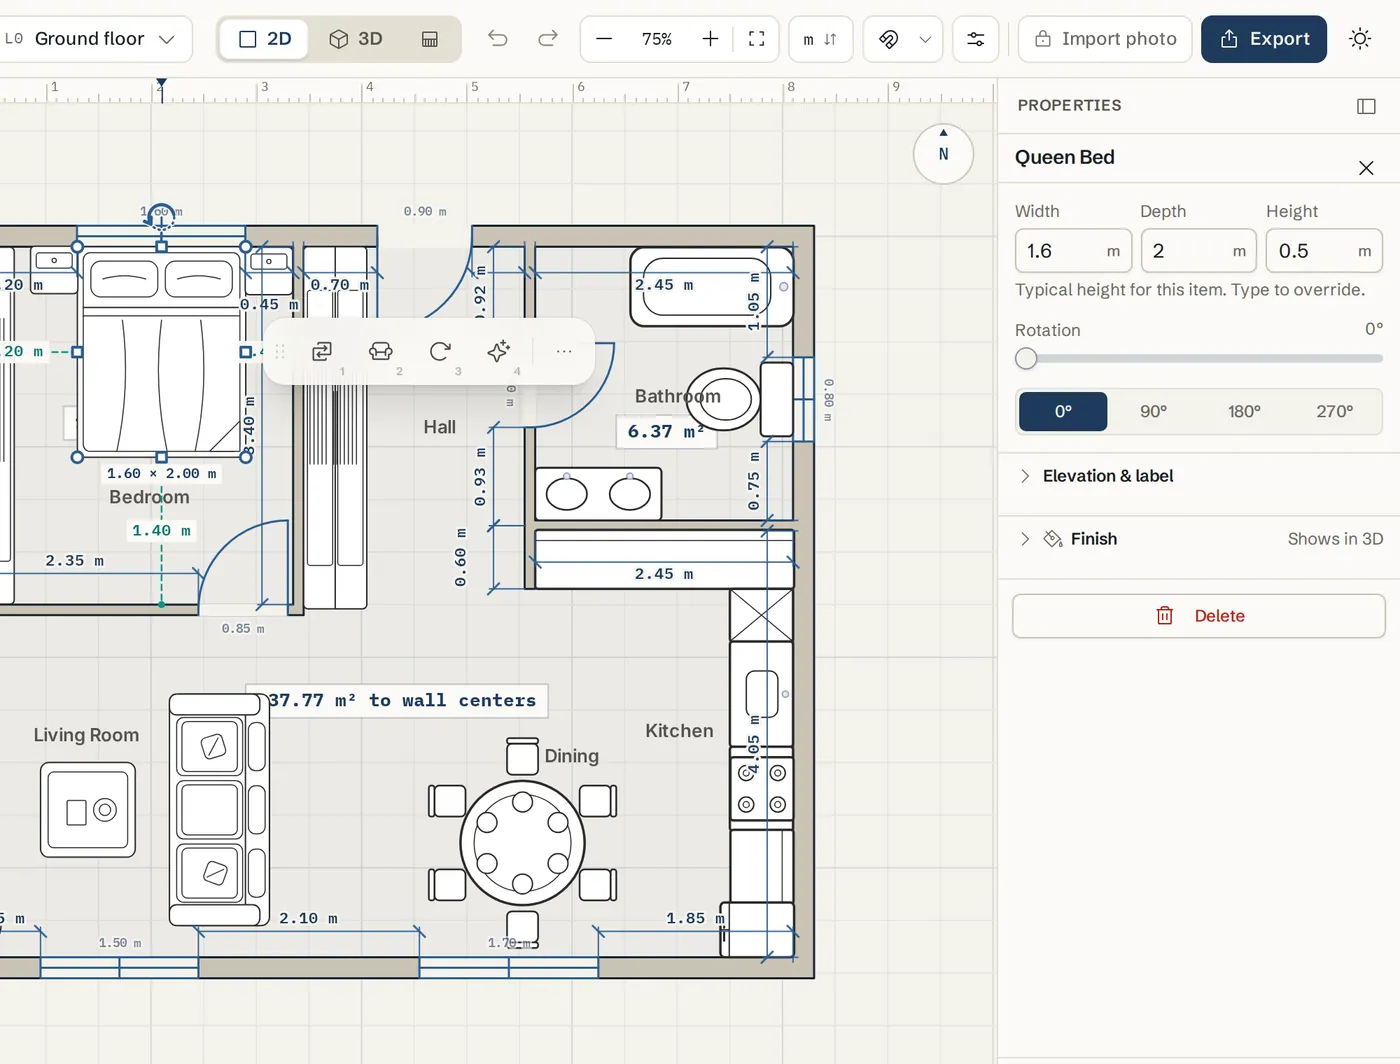
Click a wall, door, window or piece of furniture. Its settings open at the top of the right panel, and a small row of quick actions appears beside it.
Move, rotate or resize it
Drag the item to move it. Use its handles to rotate or resize. Arrow keys nudge it by 1 cm, and Shift with an arrow key nudges by 10 cm.
Select many items
Drag left to right for a window box
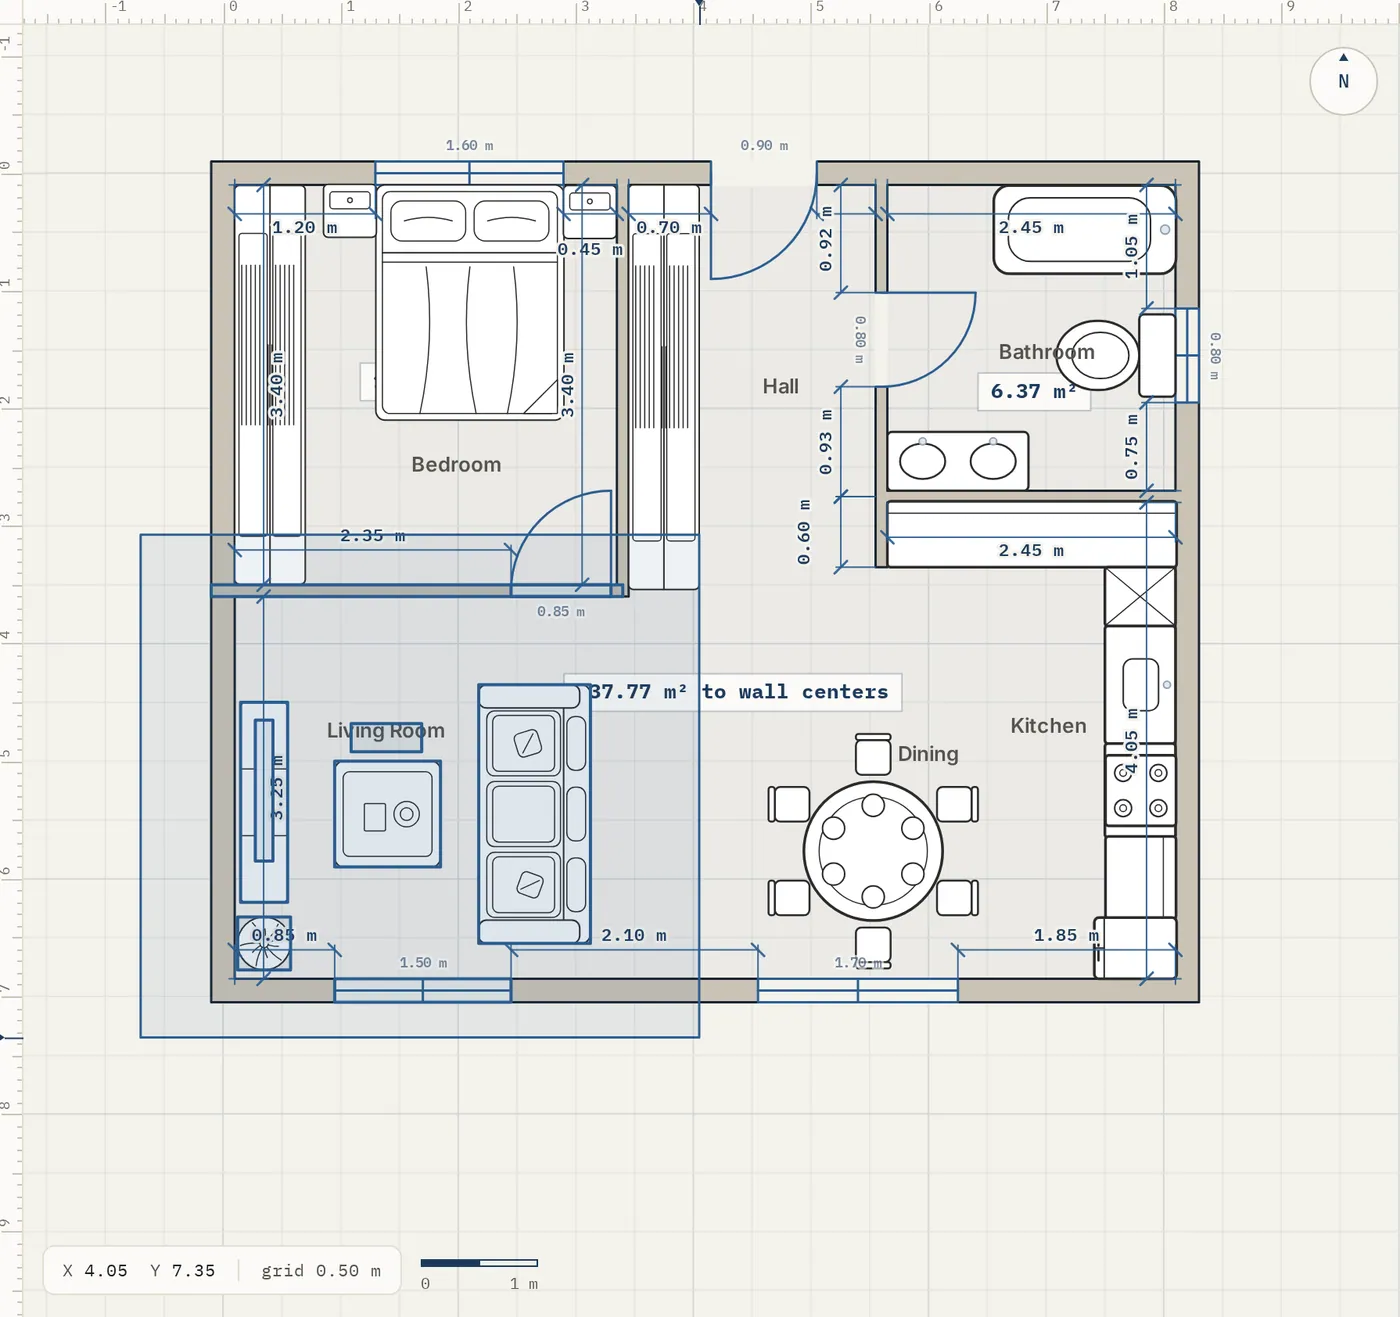
With Select on, press on an empty spot and drag to the right. A blue box appears. It picks only what fits fully inside it. Everything it will pick lights up before you let go.
Drag right to left for a crossing box
Drag to the left instead and the box turns green and dashed. It picks everything it touches, even partly.
Add to the selection
Hold Shift or Ctrl (Cmd on a Mac) and click items, or drag another box, to add them to what is already selected.
Select everything on the floor
Press Ctrl+A (Cmd+A on a Mac). It selects every wall, door, window, furniture item, room label, floor, dimension, measurement and note on the current floor.
Check what you picked
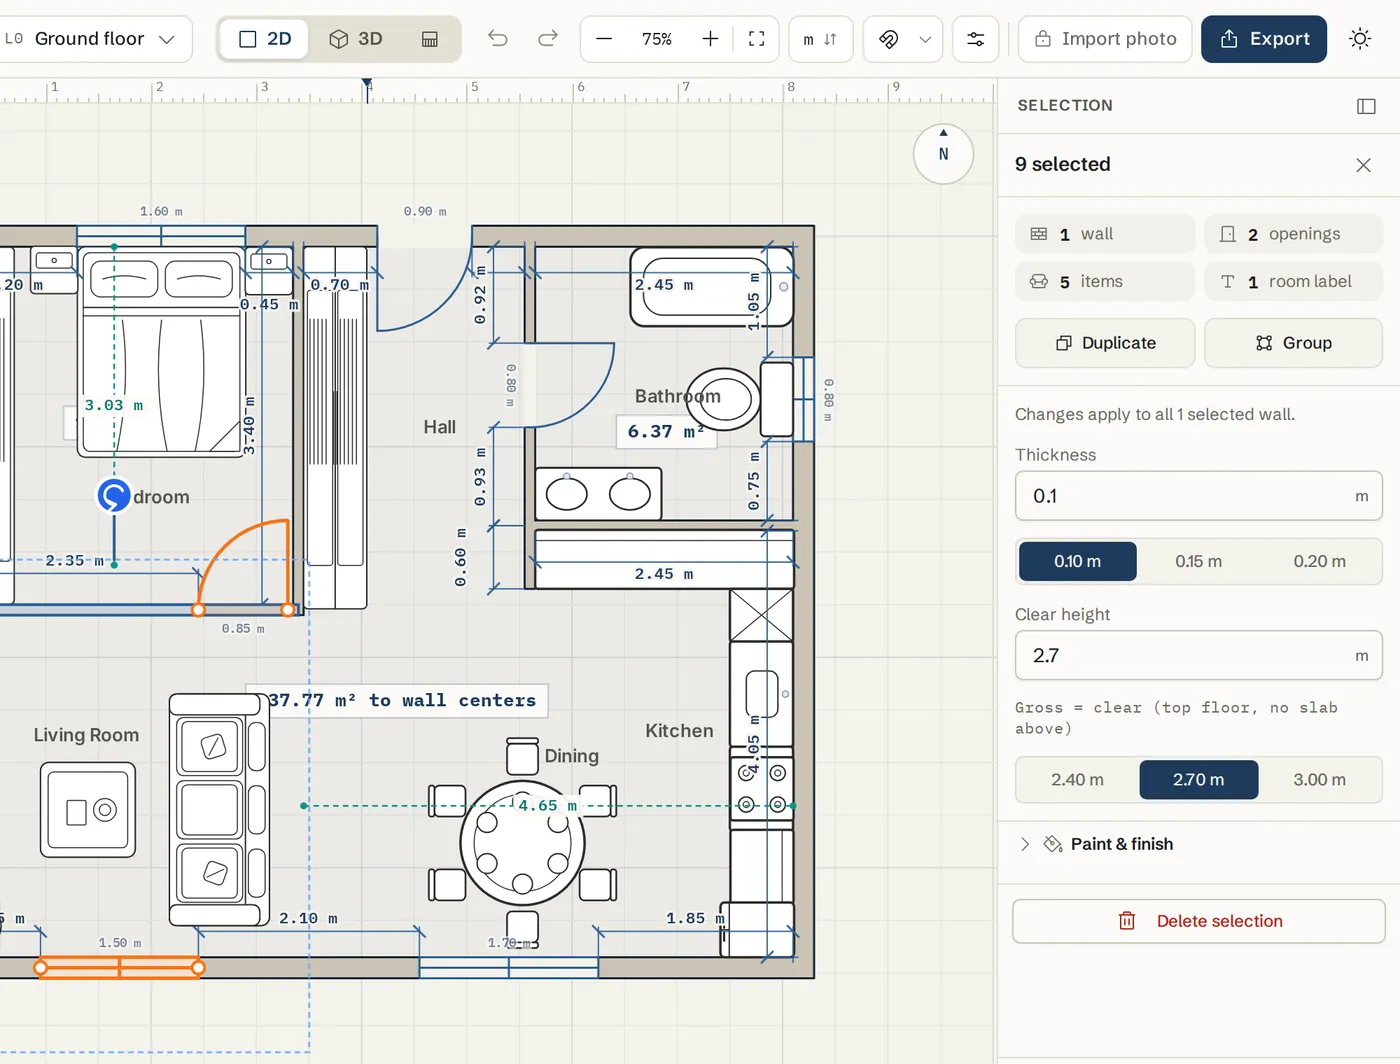
The right panel counts what is selected by kind, for example 12 walls and 4 items, with buttons for Duplicate, Group and Delete selection. Click Clear selection (the X at the top) or press Esc to start again.
Edit a selection
Copy, paste and duplicate
Ctrl+C copies and Ctrl+V pastes. Ctrl+D duplicates the selection in one step. On a Mac use Cmd instead of Ctrl. A copy works across plans: press Ctrl+A then Ctrl+C, open another floor, another project or a new canvas, and press Ctrl+V to paste the same plan. In an empty plan it lands exactly where it was.
Group items
With two or more items selected, press Ctrl+G or click Group. The group moves as one. Ctrl+Shift+G or Ungroup splits it again.
Align, reorder and lock
Right click the selection. Align lines items up (left, center, right, top, middle, bottom) or spaces them evenly. Bring to front and Send to back change the stacking. Lock position stops an item from being moved by accident, and Unlock position frees it.
Delete
Press Delete or Backspace, or click Delete selection in the right panel.
Tips
- A drag that starts on a floor, lot or balcony draws a selection box, even when it is selected, so you can box select the furniture on a patio. Click once to select the floor itself. To move the whole area, use Move floor, Move lot or Move balcony in its properties, or the arrow keys.
- Selecting several walls lets you change the thickness and height of all of them at once in the right panel.
- The Layers panel has a select all button on each row, for example all doors and windows on this floor.
- If the quick actions palette covers your dimensions, drag it aside, or turn off Selection actions in Settings.
Common problems
- I cannot select or move an item
- It may be locked. Right click it and choose Unlock position. Also check its layer is visible in the Layers panel: hidden items cannot be picked.
- The box selects too much or too little
- Drag left to right to take only what is fully inside the box. Drag right to left to take everything the box touches.
- Delete does nothing
- Click on the plan first so it has focus, then press Delete. While you are typing in a field, Delete edits the text instead.
- Moving a wall also moves the walls joined to it
- Joined walls stay connected by design: the walls around a moved wall stretch to keep the corners and T-junctions. Right-click a wall and choose Disconnect wall (or Detach from junction near one end) to move it on its own, or turn off Connected walls in Settings.
Related topics
- WallsDraw straight walls corner to corner, type exact lengths, and set thickness, height and corner join.
- Furniture libraryFind furniture and fixtures in the library, place them at real size, then move, rotate, resize, lift or swap them.
- LayersHide or show furniture, dimensions, areas, wiring, the roof, reference images and the grid.
- Keyboard shortcutsEvery shortcut for tools, editing, floors, drawing and the 3D walkthrough.
- Zoom, pan and fitZoom in and out, move the view around and bring the whole plan back on screen.
Try it on a real plan
Free, in your browser. No sign-up needed to start.