Drawing
How to draw walls
Walls are the base of every plan. Rooms, doors, windows, floors, roofs and the 3D model all come from the walls you draw.
Use the Wall tool when you want to draw a wall at a time, for example an outline you measured at home or an inside wall across a room. If you want a whole box in one go, use the Room tool instead (see Rooms).
Draw your first walls
Turn on the Wall tool
Press W, or click Wall in the left toolbar under Structure. The small label beside it says Straight. The Wall settings panel opens on the right.
Click the first corner
Click on the plan where the wall starts. A live length and angle follow your pointer.
Click the next corner
Click where the wall ends. The wall is placed and a new one starts from that point, so you can keep clicking corner after corner.
Type an exact length
After the first click, just type a number, for example 300, and press Enter. The wall is exactly that long in the direction you are pointing. You can also type a unit: 3.5m, 10' 6" or 120in.
Start a set distance from a corner
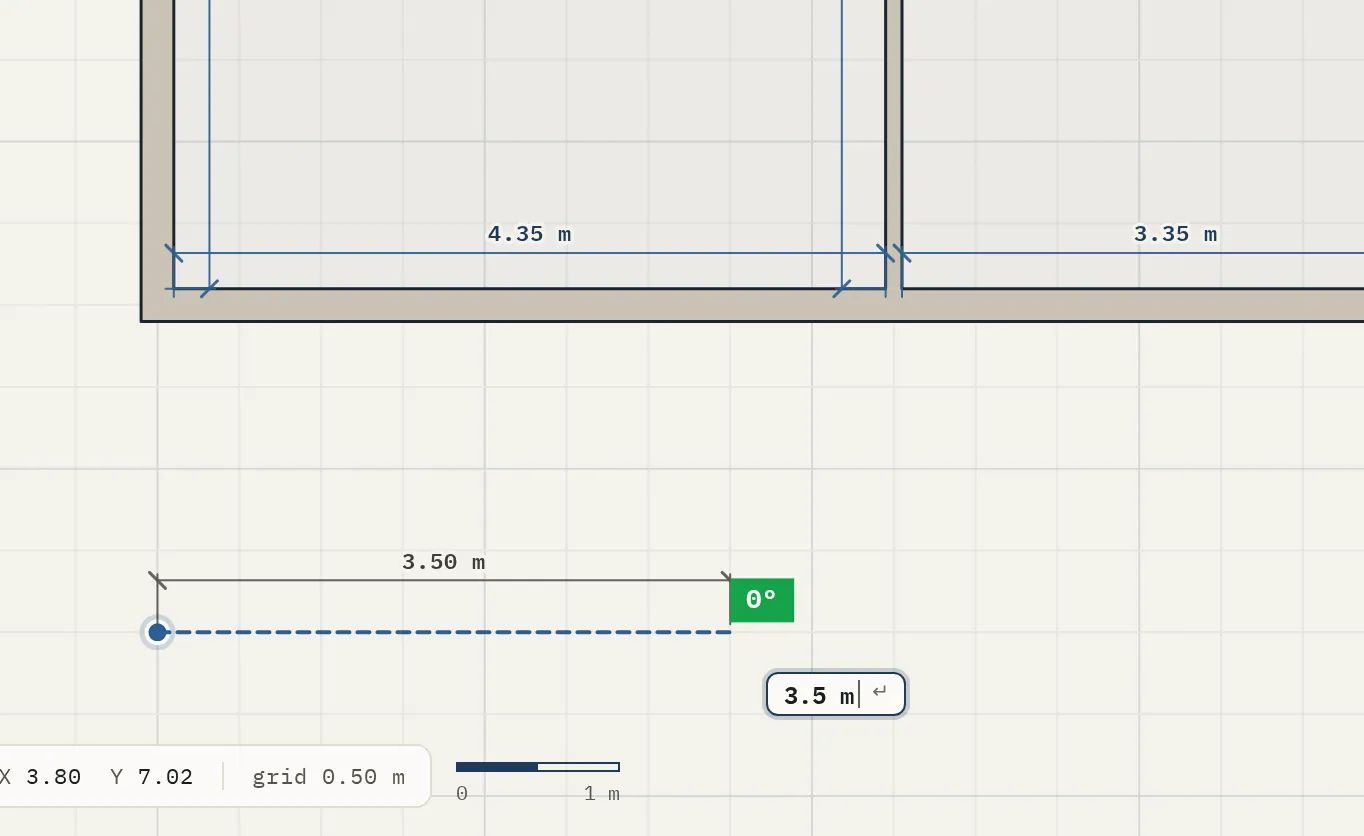
Before the first click, rest the pointer on a wall end or corner for a moment: a small orange cross marks it as the reference. Move straight across or straight down from it and a dashed guide shows the distance. Type a number, for example 0.80, and press Enter: the wall starts exactly that far from the corner.
Close the shape and finish
Click back on your first corner to close the outline. Press Esc to stop drawing. A closed outline becomes a room, with its area shown in the middle.
Set thickness, height and wall type
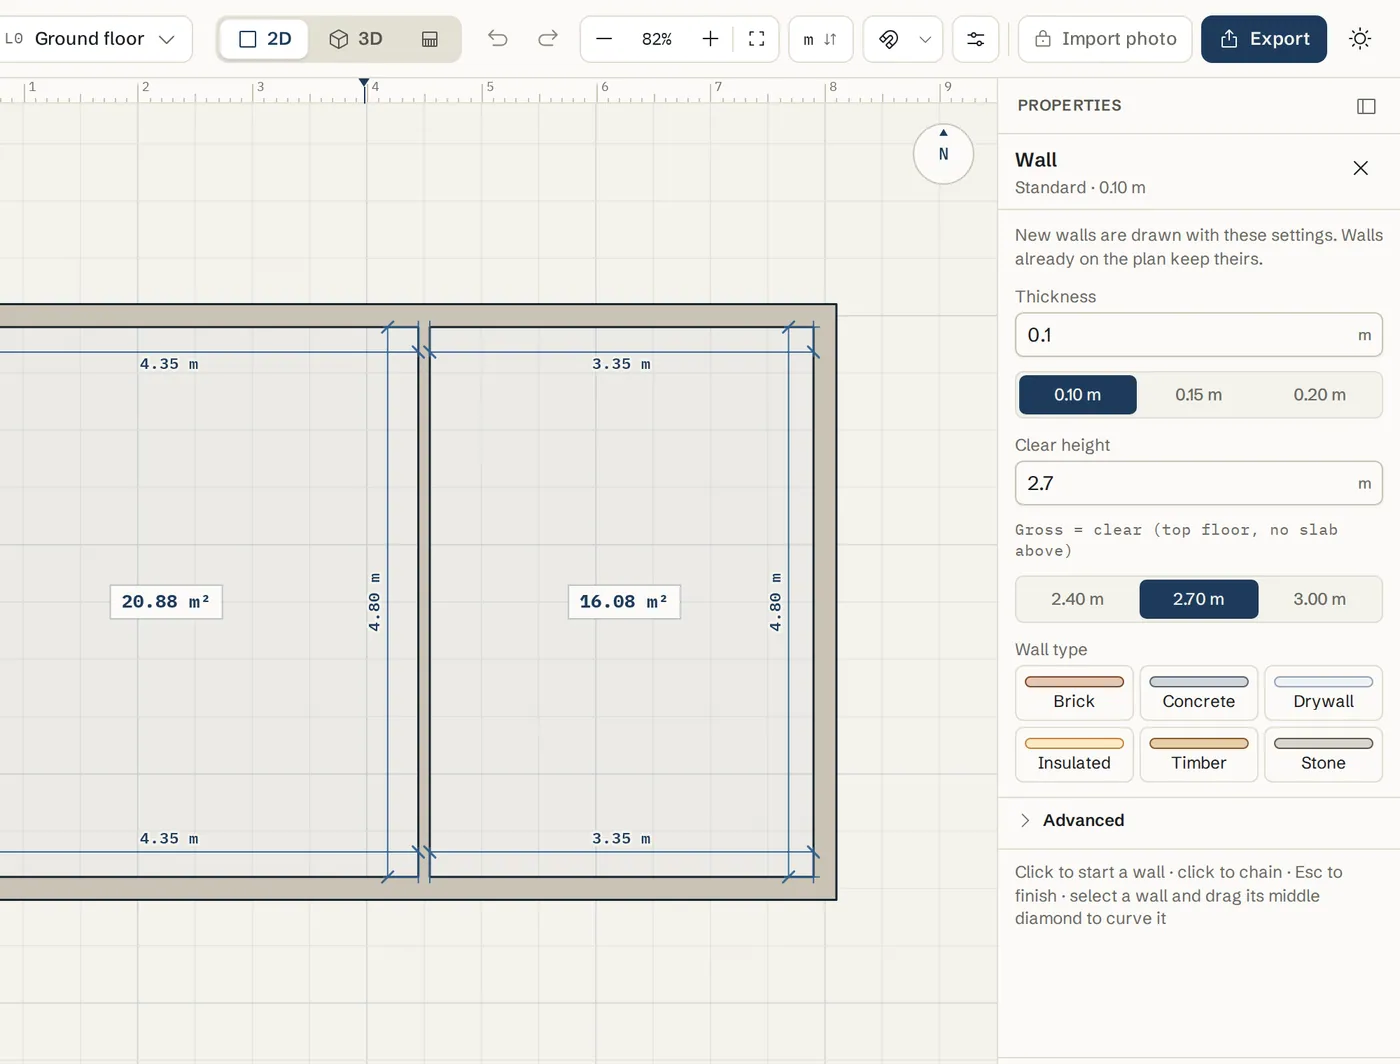
The Wall settings panel sets the NEXT walls you draw. Walls already on the plan keep theirs.
Pick a wall type
In Wall settings, choose a Wall type: Brick, Concrete, Drywall / Partition, Insulated, Wood / Timber or Stone. Each sets a typical thickness, for example 10 cm for drywall and 23 cm for brick.
Set Thickness and Clear height
Type a Thickness and a Clear height. Clear height is floor to ceiling. The standard wall is 10 cm thick and 270 cm high; Back to a standard wall resets both.
Change a wall that is already drawn
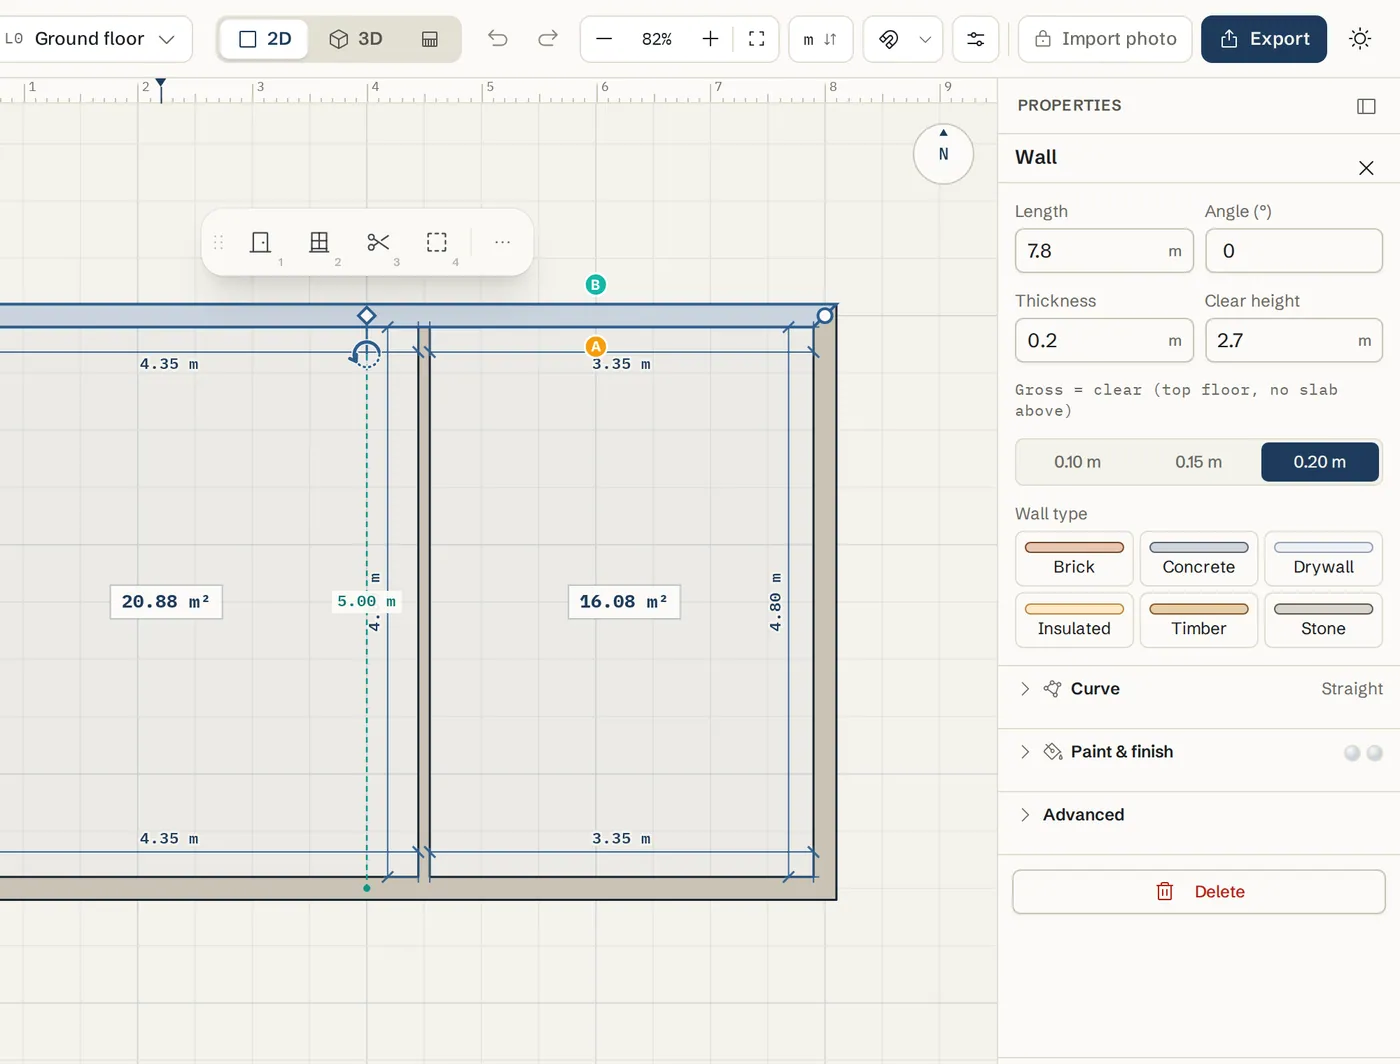
Press V for Select and click the wall. Its panel on the right shows Length, Angle (°), Thickness, Clear height and Wall type. Change any field and the wall updates.
Read the gross height
Under Clear height a small note shows the gross height, for example Gross 290 cm (270 cm + 20 cm slab). On a floor with another floor above, the wall runs up through that slab in 3D. On the top floor gross equals clear.
Make a sloped wall
For a garden or retaining wall that follows a hill, set Wall height to Sloped. Type a Start height and an End height, for example 5' 0" and 0' 6": the top runs in a straight line from one end to the other, in 3D and on the elevations. Swap ends flips which end is high. While the wall is selected, small chips at its ends show the two heights. A door or window has to fit under the top where it sits; if it does not, its panel says so. Switching back to Uniform keeps the start height.
Change many walls at once
Select several walls (drag a box around them, or Ctrl+A for everything). The right panel shows Wall type, Thickness and Clear height for all of them, with Mixed where they differ. Pick a value once and it applies to every selected wall. Corners and T-junctions are rebuilt for the new thickness, so the walls stay joined and the rooms stay closed.
Choose which line you draw along (corner join)
A wall has thickness, so the line you click can be its centre, its inside face or its outside face.
Open Settings
Click Settings (the sliders icon) in the top bar. Open Advanced and find Corner join.
Pick Centre, Inside or Outside
Centre: the line you click is the middle of the wall. Inside: you draw along the inner face, good when you measured rooms from the inside. Outside: you draw along the outer face, good when you know the outside size of the building.
Know which face is the room side
In Inside and Outside mode the wall body sits on one side of your line. The first time a wall closes a room, SpacePlanner decides which side is the room and remembers it, so the wall does not jump sides later when you move or extend it.
Snap to corners and keep walls square
Watch the snap badge
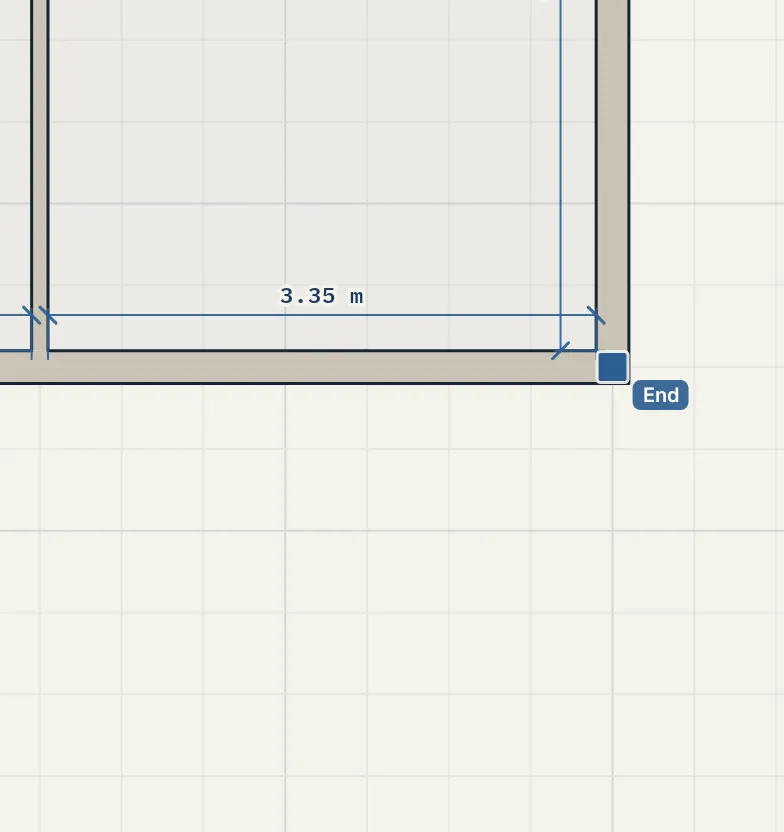
While you draw or drag a wall end, a green badge shows what it snapped to: End, Corner, Crossing, Middle, Center, Square (at right angles to another wall), On wall or Grid. On a thick wall every visible corner snaps: both corners of a free end, the inside and outside corner of an L, and the corners where a wall meets another wall's face. The marker sits on the one nearest your pointer.
Lock the angle or place freely
Hold Shift to snap the angle in steps. Hold Alt to place freely, with 1 cm precision and no snapping.
Keep every wall at 0° or 90°
Turn on Ortho view in Settings under View. Every new wall stays horizontal or vertical until you turn it off.
Move, resize, split and delete walls
Move a wall
With Select (V), drag the wall body. Walls joined to it, at a corner or a T-junction, stretch along themselves so they stay connected. Doors and windows keep their place on the walls that stretch.
Drag one end
Drag the round handle at a wall end to change its length or angle. It snaps exactly like drawing does.
Change the length by typing
Double-click the length figure next to the wall, type the new length and press Enter. The far end moves and the wall keeps its direction. If another wall joins that end, it moves with it and the walls joined to it stretch, so a room typed from 3.70 m to 3.20 m stays a closed rectangle.
Split a wall in two
Select the wall and click Split wall in the small actions bar beside it. Move along the wall to see both new lengths, then click to cut. A cut cannot go through a door or window.
Disconnect a wall from its neighbours
Connected walls stay connected when you move or resize them. To move one on its own, right-click it and choose Disconnect wall. Right-click near one end and choose Detach from junction to free only that end. Reconnect wall (or dragging the end back onto a corner) joins it again.
Delete a wall
Select it and press Delete or Backspace. Doors and windows on that wall go with it. Ctrl+Z brings it back.
Tips
- Measured your rooms from the inside? Set Corner join to Inside and Measured from to Inner face, then type the numbers you measured.
- Letters stay tool shortcuts until you type a digit, so typing a length never switches tools by accident.
- The Material label under Advanced (for example "brick") is printed text only. The look in 3D comes from Paint & finish.
- Already drew a wall straight but want it curved? Drag the small diamond in its middle. See Curved walls.
Common problems
- The number on the wall is not the length I typed
- The figure you see depends on Measured from in Settings (inner face, centre or outer face). Walls meet at corners, so the inner face is shorter than the centre line. Type the length on the figure you care about: double-click that figure and type. It will read exactly what you typed.
- There is a gap or a notch at a corner
- The two ends are not touching. Drag one end onto the other until the badge says End. If the corner still looks wrong, check that both walls have the same thickness and the same Corner join.
- My walls look thinner or thicker than I set
- The Wall settings panel only affects new walls. Select the existing walls and change Thickness in the right panel.
- Dragging a wall moves other walls too
- Joined walls stay connected on purpose. Right-click the wall and choose Disconnect wall (or Detach from junction near one end), or turn off Connected walls in Settings.
- I cannot draw at an angle
- Ortho view is on. Turn it off in Settings under View, or hold Alt while you click.
Related topics
- Curved wallsDraw a curved wall, set its radius, or bend a straight wall you already drew.
- RoomsDraw a whole room in one drag: rectangle, L-shape, round or any shape, at an exact size.
- Dimensions & measuringWall lengths on the plan, which face they measure, typing a length, and extra dimension lines.
- Doors & windowsPlace doors and windows on walls, then set the style, size, swing, hinge and sill height.
- Grid and snappingMake points land on the grid or on other walls, keep walls square, or place things freely.
- Units (cm, m, ft-in)Choose metric or imperial units for the whole plan and type lengths in any format.
Planning a whole project?
Try it on a real plan
Free, in your browser. No sign-up needed to start.