Basics
How the grid, snap to grid and object snaps work
Snapping pulls your pointer to useful spots so walls meet exactly and rooms stay square. There are two kinds.
Object snaps jump to wall ends, corners, middles, crossings and wall faces. They are on by default. Snap to grid makes points and moves land on a regular step, like every 10 cm. It is off until you turn it on.
When both could apply, an object snap within reach always wins. Hold Alt to switch all snapping off for one placement.
Turn on Snap to grid
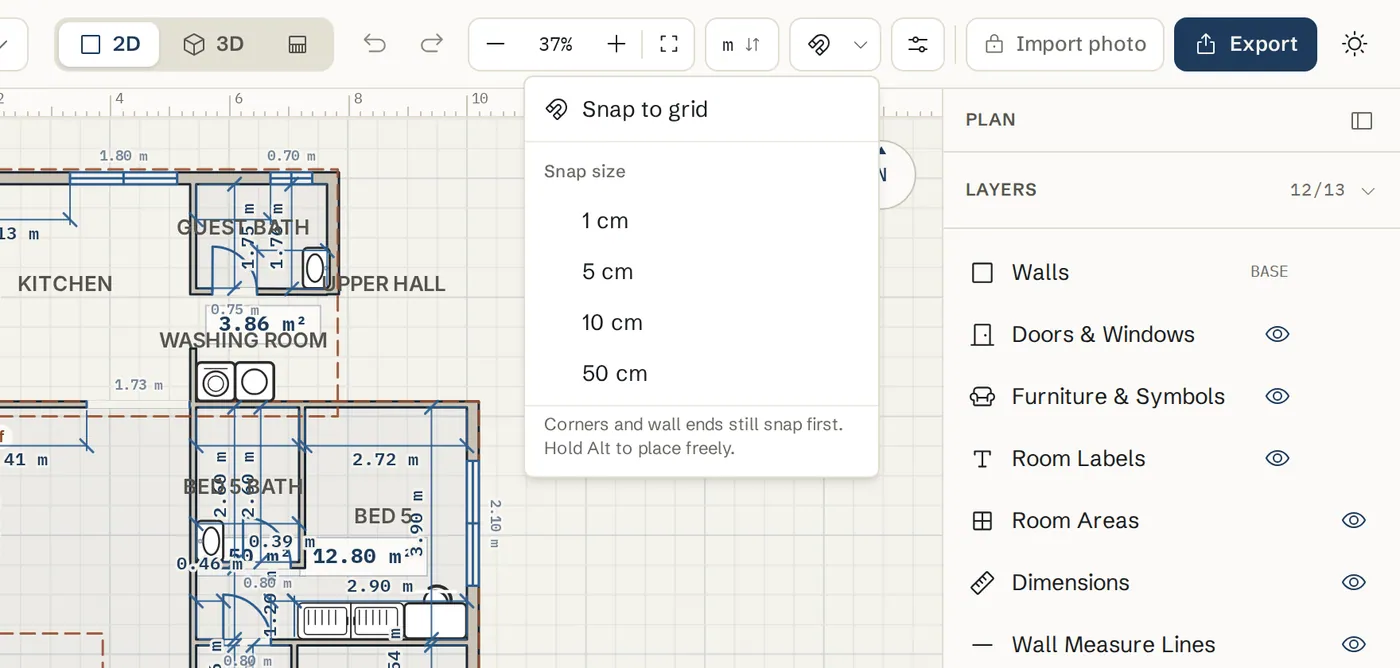
Click Snap in the top bar
The magnet button next to the units button switches Snap to grid on and off. When it is on, the button is highlighted and its tooltip reads Snap to grid is on (hold Alt to place freely).
Pick the snap size
Click the small arrow beside the magnet. Under Snap size choose a step: 1 cm, 5 cm, 10 cm or 50 cm in metric plans, 1 in, 6 in or 1 ft in imperial plans. The grid size is offered too.
Draw and move as usual
Wall points, room corners and furniture moves now land on that step. The status strip at the bottom left of the plan shows the current snap size.
Change the grid you see
Open Settings
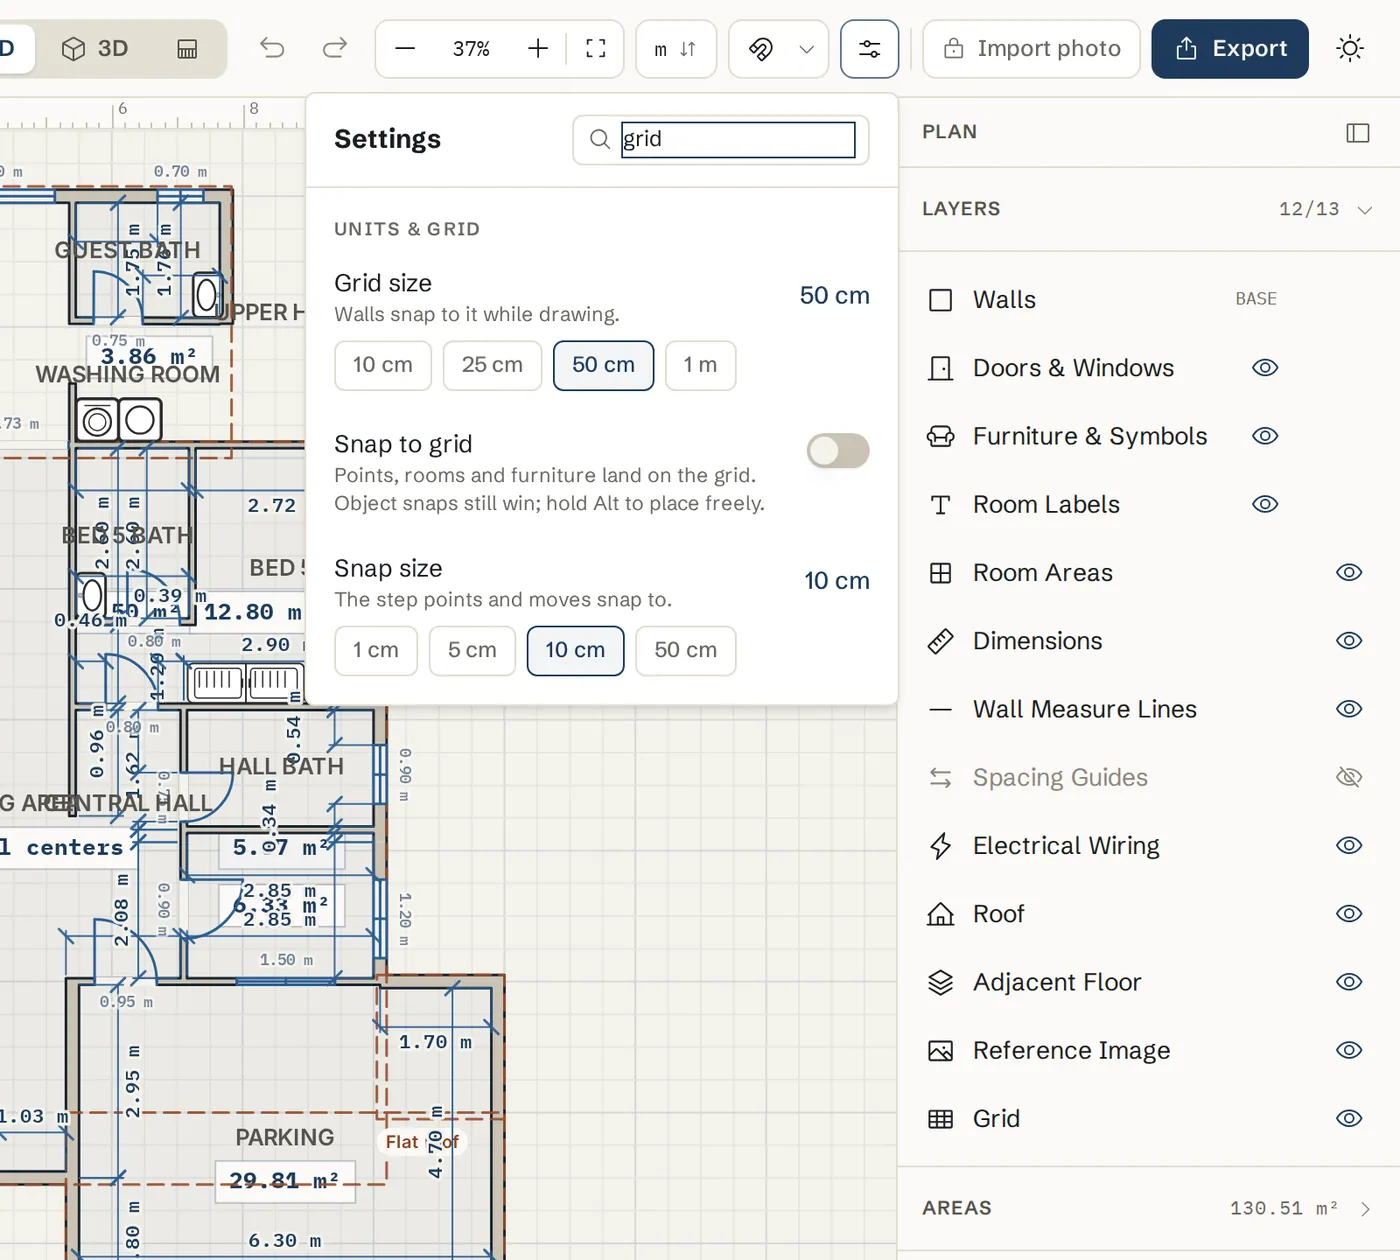
Click Settings in the top bar. Under Units & grid, Grid size sets the spacing of the grid lines: 10 cm, 25 cm, 50 cm or 1 m in metric, 6 in, 1 ft, 3 ft or 5 ft in imperial.
Hide the grid if you like
Turn off the Grid row in the Layers panel to hide the grid lines. Snapping still works.
Object snaps and square walls
Watch the snap badges
While you draw or drag a wall end, a small badge names the snap: End, Middle, Crossing, Square, On wall, Center or Grid. Faint alignment guides show when you line up with another corner.
Lock to right angles with Shift
Hold Shift while drawing to lock the angle to steps. Turn on Ortho view in Settings under View to keep every wall at 0° and 90°.
Place freely with Alt
Hold Alt while you click or drag to ignore every snap. Use it for fine placement or when a snap keeps pulling you to the wrong spot.
Turn object snaps off
In Settings under Walls, switch off Object snaps if you never want to snap to endpoints, midpoints and intersections.
Tips
- Snap to grid is saved with each plan, so one plan can snap and another not.
- On an upper floor, walls also snap to the walls of the floor below, so storeys line up. See Floors and levels.
- Arrow keys nudge a selection by 1 cm and Shift with an arrow by 10 cm, whatever the snap setting.
- Typing an exact length is often faster than snapping. See Walls and Dimensions.
Common problems
- My walls jump to the wrong place
- An object snap is pulling them. Hold Alt while you place the point, or turn off Object snaps in Settings. If they jump to a regular step, Snap to grid is on: click the magnet in the top bar to turn it off.
- I cannot draw a wall at an angle
- Ortho view is on. Turn it off in Settings under View, or from the More menu on a phone.
- Furniture will not sit exactly where I want
- Furniture snaps flush to nearby walls, and to the grid when Snap to grid is on. Hold Alt while dragging, or nudge it with the arrow keys.
Related topics
- WallsDraw straight walls corner to corner, type exact lengths, and set thickness, height and corner join.
- Units (cm, m, ft-in)Choose metric or imperial units for the whole plan and type lengths in any format.
- Dimensions & measuringWall lengths on the plan, which face they measure, typing a length, and extra dimension lines.
- Selecting and editingPick one item or many, then move, copy, group, align, lock or delete them together.
- Floors & levelsAdd floors and basements, switch between them, and make each storey line up with the one below.
Try it on a real plan
Free, in your browser. No sign-up needed to start.