Building features
How to add floors, basements and line up storeys
A plan can have several floors, stacked on top of each other like a real building. Each floor has its own walls, rooms, doors, windows and furniture. In 3D you see them all together.
Use floors for a two storey house, a loft, or a basement. Floors are saved in a project, so you need a free account to add one. Your guest drawing comes with you and becomes the ground floor.
Add a floor or a basement
Everything about floors lives in the Floors control in the top bar, next to the plan name.
Open the Floors control
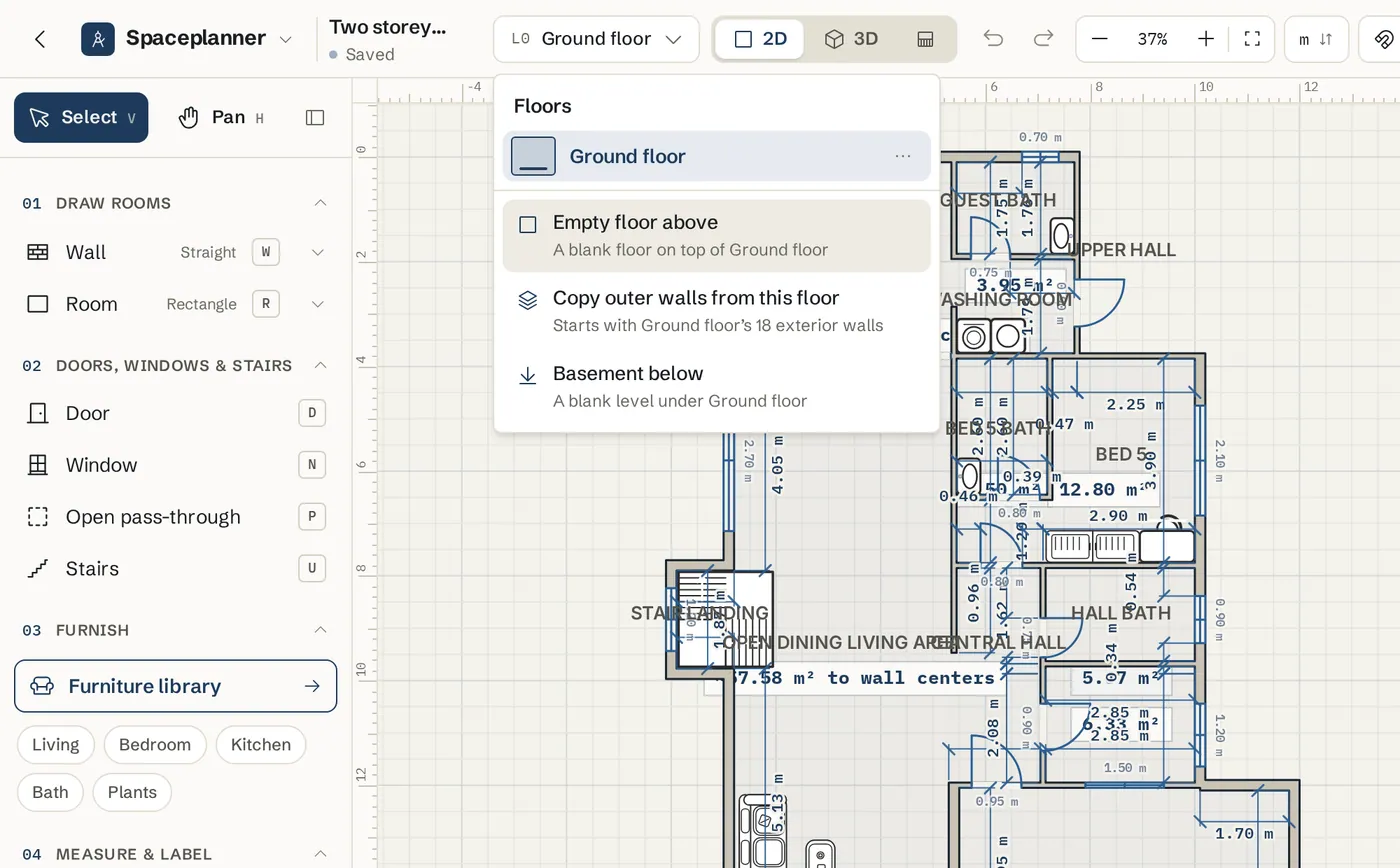
In the top bar, click the floor button. It shows a level tag and the floor name, for example L0 Ground floor. A list of your floors opens, top floor first.
Sign up if you are a guest
As a guest you see Create a free account to add floors. Click Sign up free. If you are signed in but the plan is not saved yet, click Save to my account. Your drawing moves into the account as the ground floor.
Click Add floor
At the bottom of the menu, click Add floor. Three choices appear.
Pick how the new floor starts
Empty floor above adds a blank floor on top of the building. Copy outer walls from this floor starts the new floor with the exterior walls of the floor you are on, so the outline matches exactly. Basement below adds a blank level under the lowest floor.
Know where the roof goes
Added from the outer walls on top of the building, the new floor takes the roof: it moves up from the floor below, with Undo in the message. An empty floor keeps the roof below and offers Move up, so you can move it once the new floor has walls.
Start drawing on the new floor
The editor switches to the new floor straight away. The floor below shows faintly as a guide, and new walls snap to it. Draw it like any plan.
Switch, rename, reorder and delete floors
Switch floors
Click a floor in the Floors list. Or press Alt+Up for the floor above and Alt+Down for the floor below. These work in 2D and 3D. With the plan focused, PageUp and PageDown also work.
Rename a floor
Double-click its name in the Floors list, type the new name and press Enter. You can also click the ... button on the row and choose Rename.
Duplicate or move a floor
In the row's ... menu, Duplicate copies the floor and its whole plan and adds it on top. A roof is not copied: it moves up to the copy, the new top floor. Move up and Move down change its place in the stack.
Delete a floor
Choose Delete floor in the row's ... menu. This removes the floor, everything on it and its roof, and stairs that led to it stop connecting. You cannot undo this yourself, but a copy is kept in the floor's version history so support can restore it. A plan always keeps at least one floor.
Line up a floor with the one below
Upper floors and basements trace the floor next to them, so outer walls stack flush.
Keep the Adjacent Floor layer on
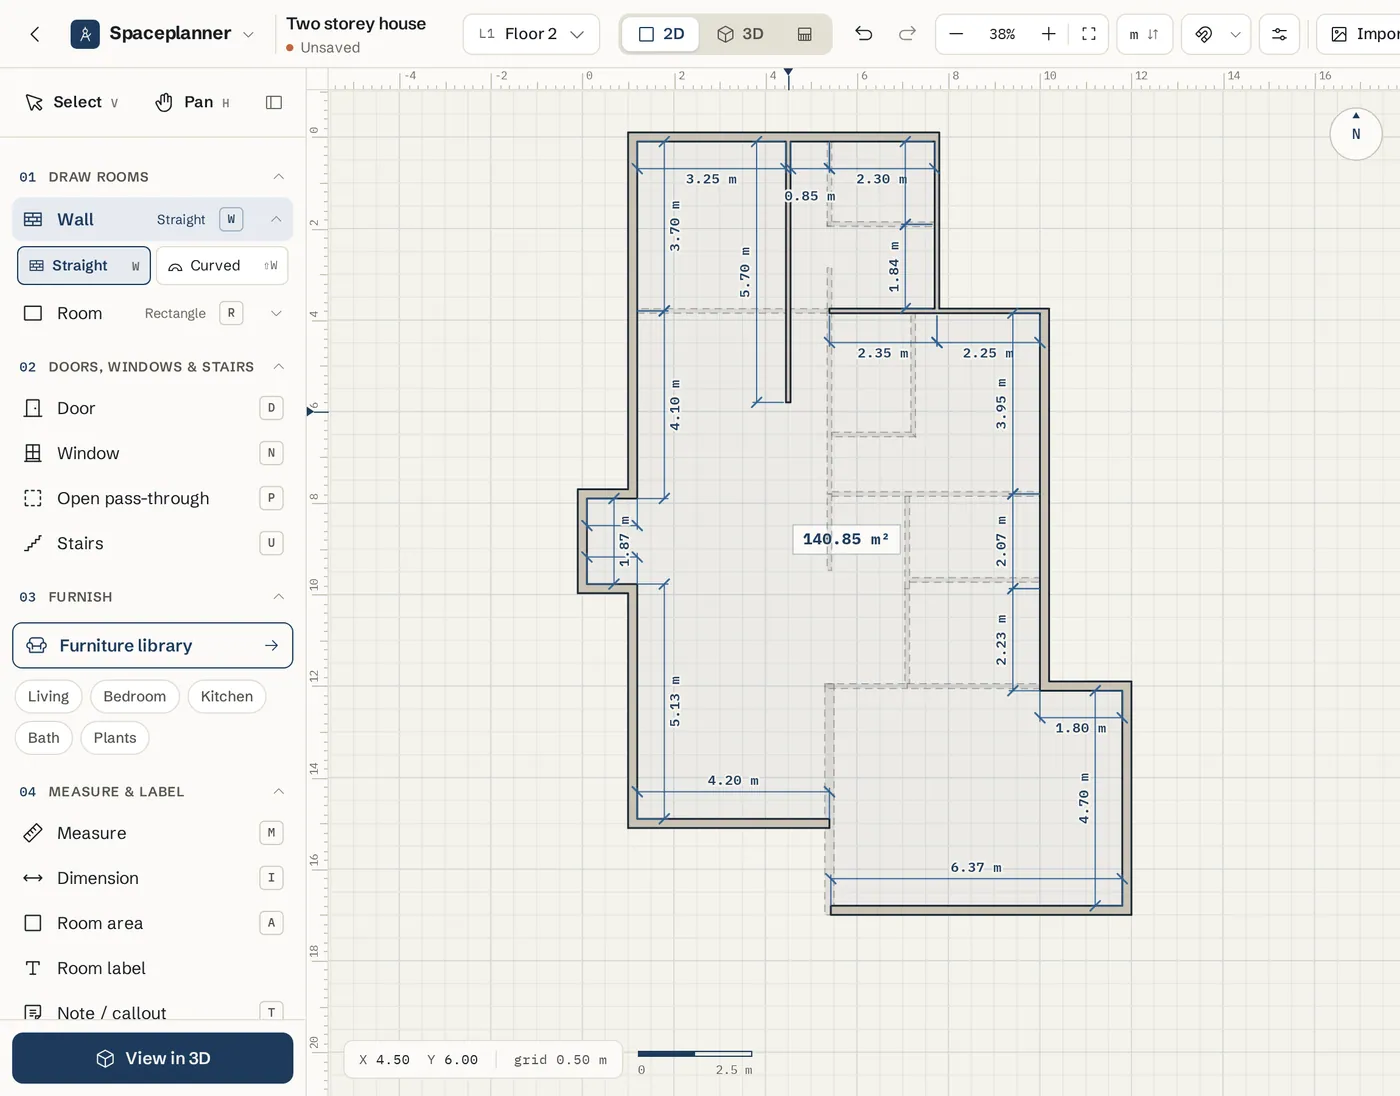
In Layers on the right, Adjacent Floor draws the floor below (for a basement, the floor above) as a faint tracing. Snapping to it only works while this layer is on.
Draw walls onto the tracing
Press W and click near a wall of the floor below. Outer walls snap to its outside face, so the facades line up. Inner walls snap to its centreline. A small badge names the snap, for example End or On wall.
Place a wall freely when you need to
Hold Alt while you click to ignore the snaps. Walls further away than the snap distance are never pulled, so setbacks and overhangs are easy to draw.
Check the storeys in elevation or 3D
Open Elevation in the top bar, or 3D, to see that the walls of each floor sit on top of each other.
See and arrange floors in 3D
Show all floors or just one
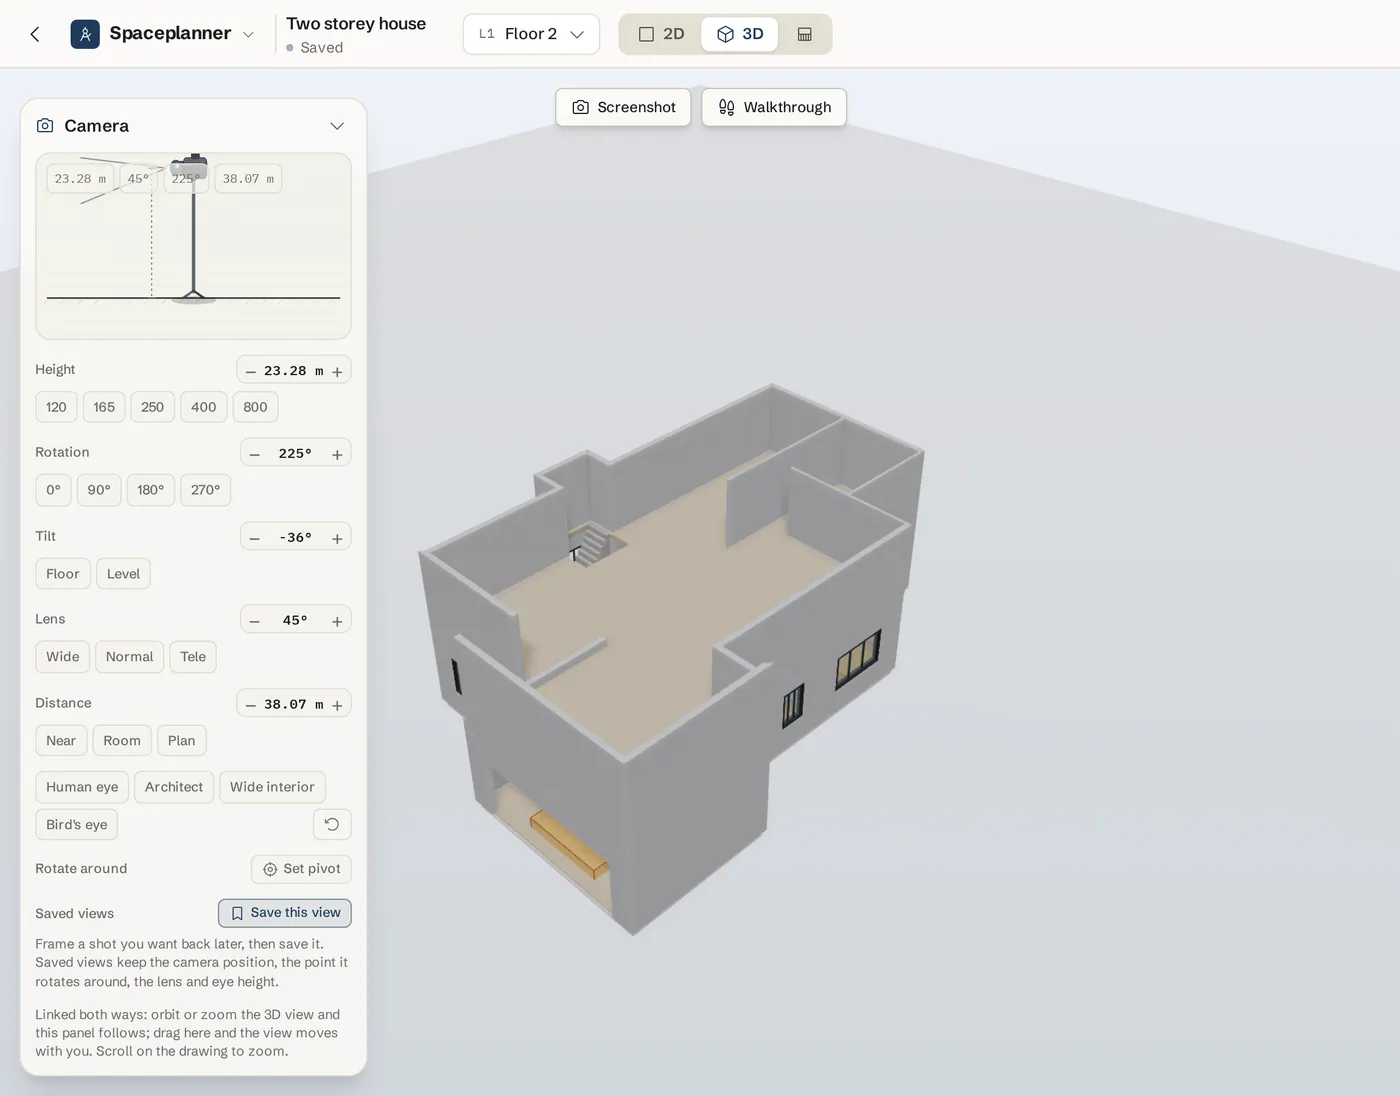
Switch to 3D in the top bar. Open Floors and use In 3D: All floors or This floor to see the whole building or only the floor you are editing.
Open the Levels panel
In 3D, click the plan name at the top left to open the floor menu. Levels lists every floor. Use Show all, or the eye button on a row to hide one level, and Open to edit it.
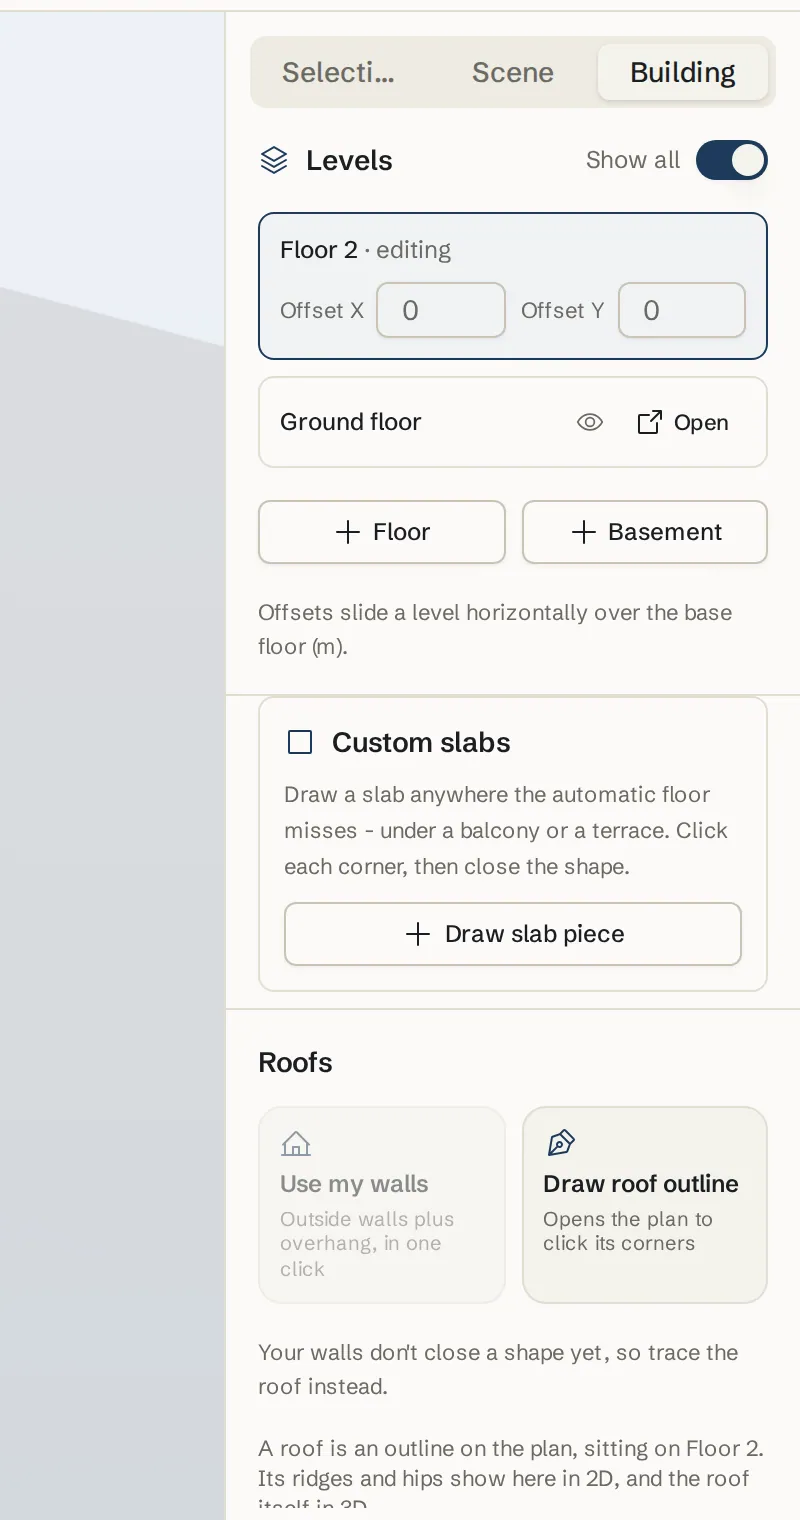
Shift a level sideways
Change Offset X or Offset Y on a level to slide it over the base floor, for example for a cantilevered upper floor. The Floor and Basement buttons add a level from here too.
Tips
- Floor to floor height is the wall's Clear height plus the slab of the level above. The wall panel shows it as, for example, Gross 290 cm (270 cm + 20 cm slab). On the top floor gross equals clear, because there is no slab above.
- New plans and new floors get a 20 cm slab. Change it for a whole level with Slab thickness in the Floor properties (select a floor with V) or on the floor slab in 3D. On an upper floor the slab hangs below the floor, as the ceiling of the level below.
- The slab under an upper floor follows its rooms and balconies, not the floors you draw, so a floor over part of a room never leaves a hole in the ceiling below. For a balcony that sticks out past the walls, use Balcony & terrace (S).
- A new floor copies the Corner join of the floor it starts from, so both storeys measure walls the same way.
- Use Copy outer walls from this floor when the upper floor has the same footprint. It is the fastest way to get the facades exactly on top of each other.
- You can also manage floors from your plans page: open a project from My floor plans to add, rename, reorder, duplicate or delete its floors.
- Put stairs between floors and connect them, so 3D shows one continuous stairwell. A stair connects any two floors you pick (From level, To level), up or down, adjacent or not. See the Stairs guide.
- Every floor has its own elevation: a basement at −1.20 m and an office at +1.20 m is two floors, nothing more. ±0.00 is the project datum, a reference height drawn as the GL line in elevations. It is not a floor and never adds one; a floor only sits at ±0.00 if you have one there.
Common problems
- I cannot add a second floor
- Floors live in a saved project. As a guest, open Floors, click Add floor, then Sign up free. Your drawing becomes the ground floor of the new project.
- Copy outer walls from this floor is greyed out
- It says Needs a closed room on this floor. Close the outside walls so they form at least one room, then try again.
- The upper floor steps in or out by half a wall in elevation
- The two floors use a different Corner join. Open Settings, then Advanced, and set Corner join on the upper floor to match the floor below (usually Inside). New floors copy it for you; older projects may need this once.
- New walls do not snap to the floor below
- Turn on Adjacent Floor in Layers. Also check you are not holding Alt, which places freely.
- I only see one floor in 3D
- Open Floors in the top bar and choose All floors under In 3D, or use Show all in the Levels panel.
Related topics
- StairsPlace a stair, shape it in the Stair configurator, give it finishes and connect it from one floor to another, up or down.
- RoofsStart a flat or pitched roof from your walls, or trace its outline, then pick the style, pitch and overhang.
- WallsDraw straight walls corner to corner, type exact lengths, and set thickness, height and corner join.
- Slabs and balconiesDraw balconies and terraces, give them railings (automatic or drawn), and manage the automatic floor slab of each level.
- 3D view & walkthroughSee the same plan in live 3D, light it, look inside, save views, walk through it and turn a view into a realistic photo.
- Saving and your accountGuest plans save in your browser; a free account keeps every plan, with version history.
Planning a whole project?
Try it on a real plan
Free, in your browser. No sign-up needed to start.