Basics
Getting started with SpacePlanner
SpacePlanner is a free floor plan editor that runs in your browser. You draw a plan from above in 2D, and the same plan is ready in 3D at any time. There is nothing to install.
You can start drawing straight away without an account. Your plan saves in this browser as you work. Create a free account when you want to keep it for good, export it, share it or add more floors.
This page walks you through the screen and your first room. Each tool has its own page with more detail.
Find your way around the screen
Open the editor
Go to spaceplanner.co and click Start Drawing, or open a template. The editor opens with an empty grid, ready to draw.
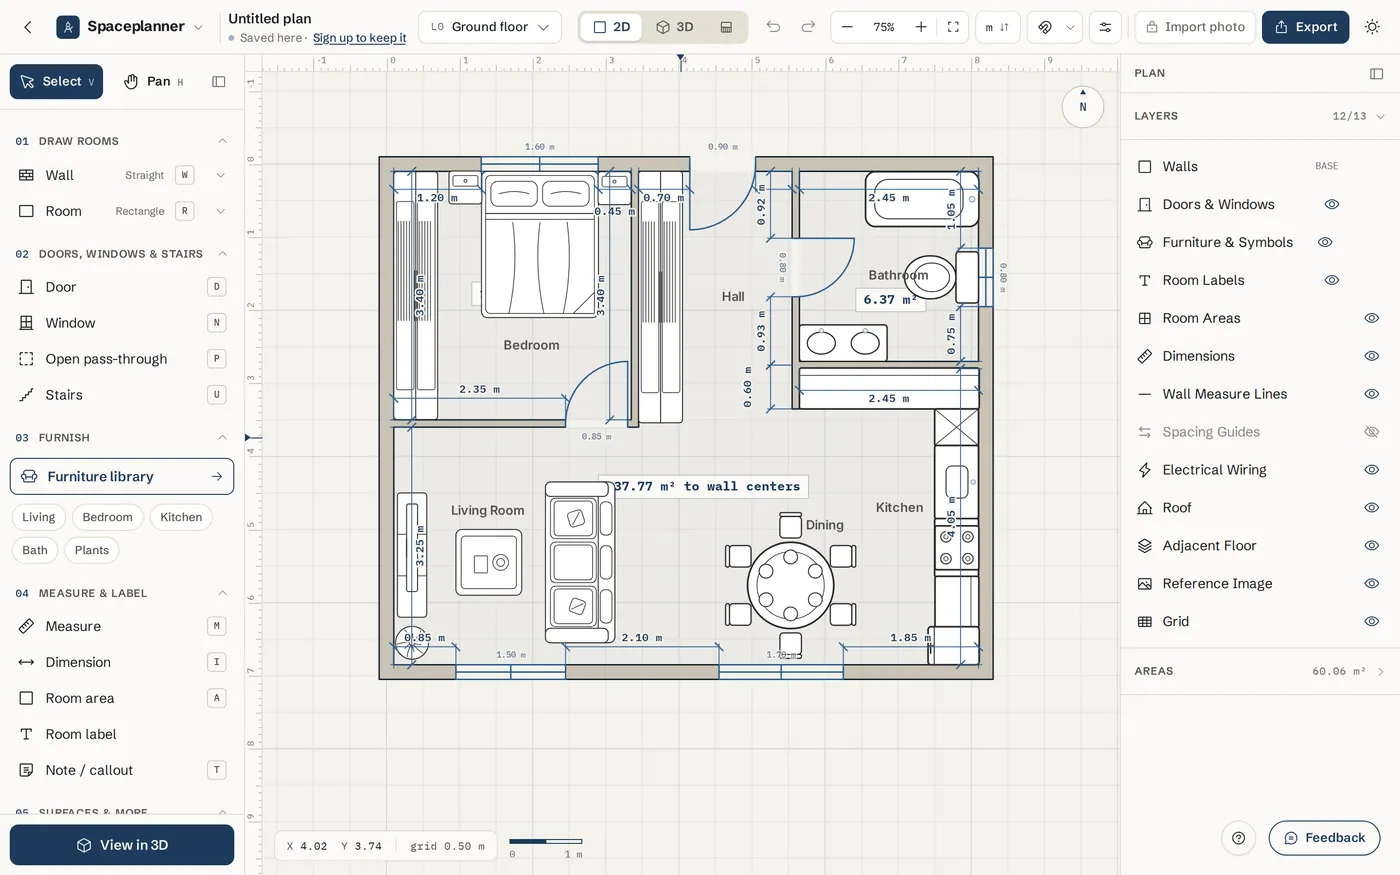
The left toolbar holds the drawing tools
Tools are grouped in numbered sections, in the order you build: Structure (walls, rooms, floor, roof, balcony & terrace), Openings & circulation, Furnish, Measure & label, Outdoor and Electrical. The letter badge next to each tool is its keyboard shortcut. Select and Pan sit at the top, and View in 3D at the bottom.
The top bar holds the plan controls
From left to right: the plan name and Plans menu, the Floors control, the 2D, 3D and Elevation switch, Undo and Redo, zoom, the units button (for example cm or ft-in), Snap, Settings, Import photo and Export.
The right panel shows settings and layers
With nothing selected it shows Layers and Areas. Select a wall, door or piece of furniture and its settings appear at the top of the same panel.
Draw your first room
Pick the Room tool
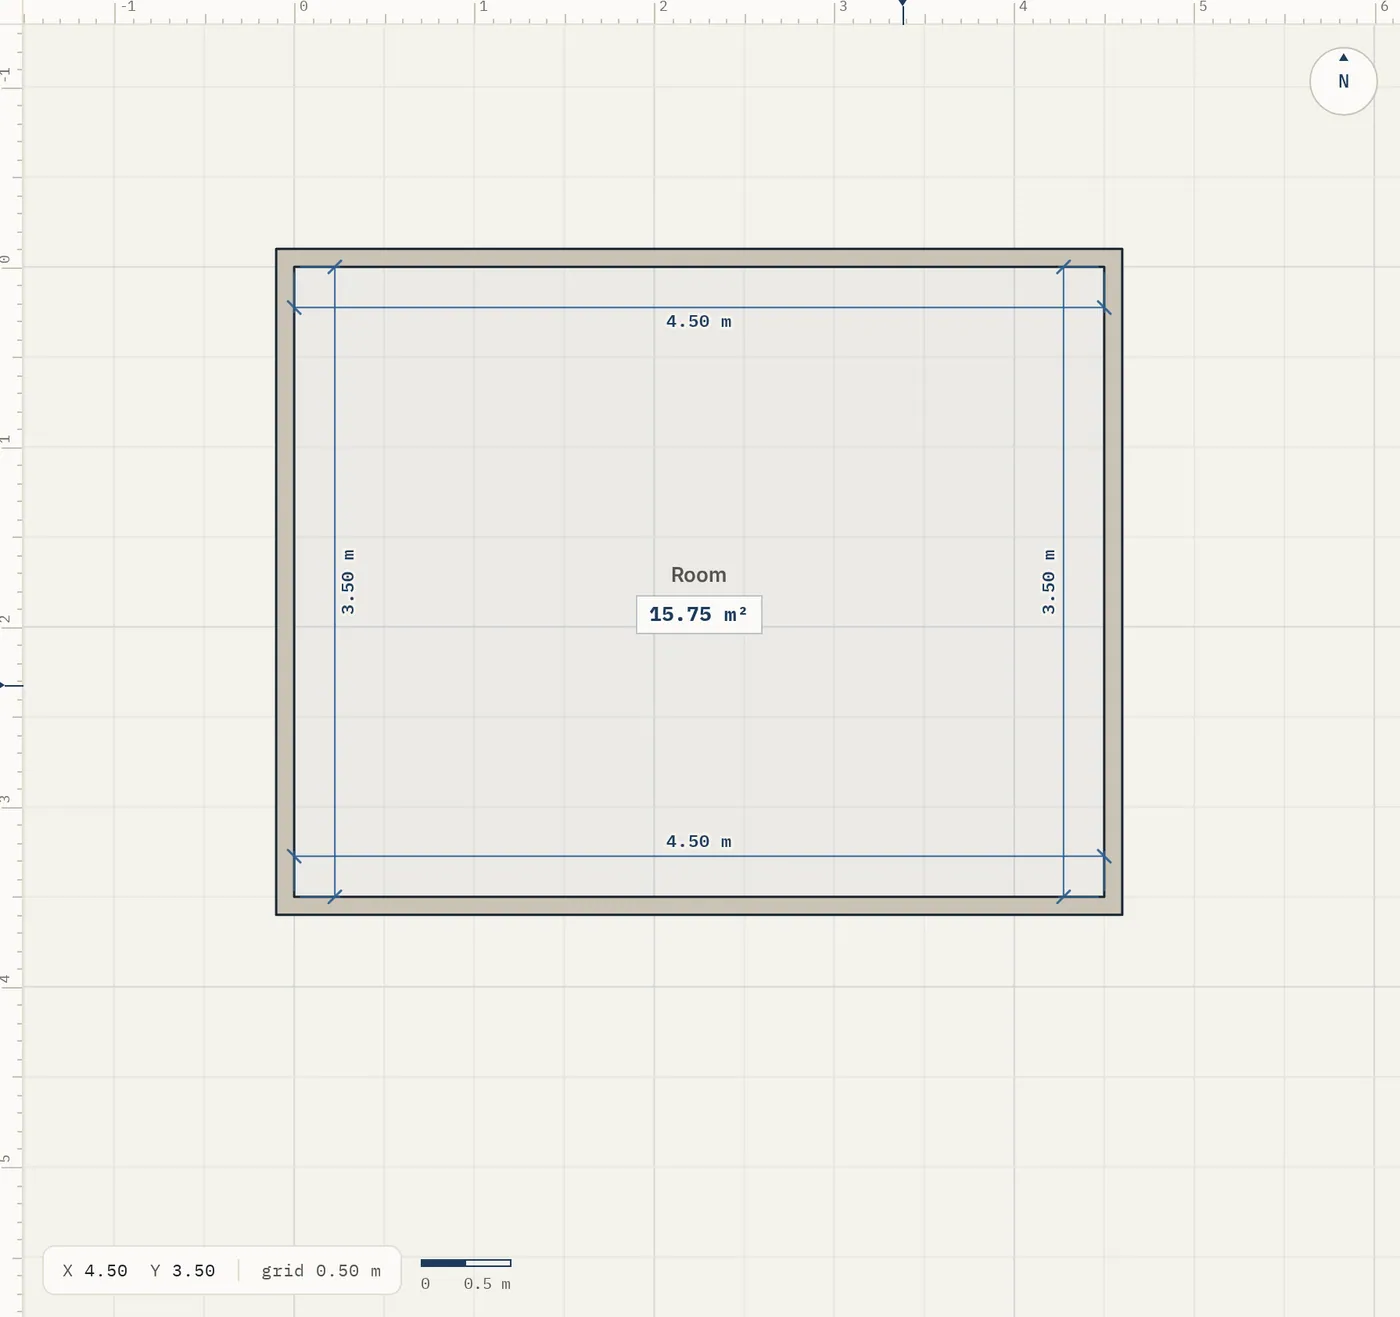
Press R or click Room under Structure. The shape is Rectangle by default. The small arrow next to it lets you choose L-shape, Any shape or Round.
Drag out the room
Press on the grid and drag to the opposite corner. While you drag you can type the size, for example 400x300, and press Enter. Four walls are drawn at once.
Add a door and a window
Press D for the Door tool, pick a style and click on a wall. Press N for the Window tool and do the same. Each click places one opening and the editor goes back to Select, so press the key again for the next one.
Furnish it
Press B or click Furniture library. Pick a category or search, for example sofa or bed, click an item and then click inside the room to place it.
See it in 3D
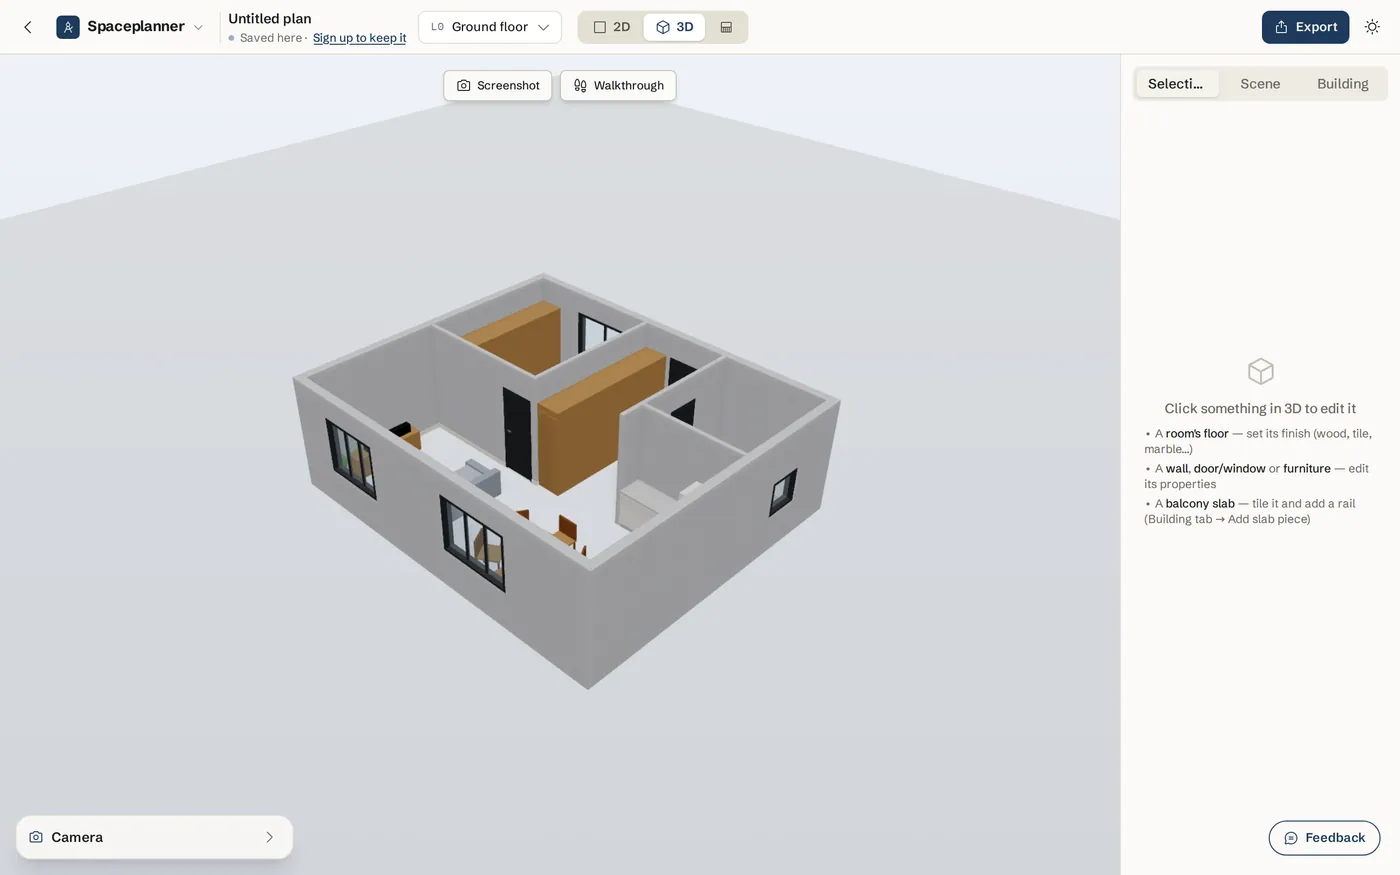
Click 3D in the top bar or View in 3D at the bottom of the toolbar. Drag to orbit and scroll to zoom. Click 2D to go back and keep drawing.
Search for any tool, item or answer
The search box in the top bar finds tools, furniture, settings and help in one place, in any of the six languages.
Open the search
Press Ctrl+K (Cmd+K on a Mac) or /, or click the search box in the top bar. On a phone, tap the magnifying glass.
Type what you want
Type a tool, a piece of furniture or a question, for example office chair, spiral stairs or how to add a roof. Use the arrow keys and Enter, or click a result. Tools and settings run straight away, and help results open the tutorial.
Convert units
Type a conversion such as 250 cm to ft, or just cm to ft, and the answer shows at the top of the results. Press Enter to copy it.
Keep your work
Check the save status
Under the plan name the status reads saved here while you are not signed in. That means the plan is stored in this browser only.
Create a free account to keep it
Click Sign up to keep it in the top bar. Your drawing moves into your new account and opens right where you left off. After that it saves to your account automatically.
Tips
- Click the ? button at the bottom right of the editor for the Quick tutorial, What's new and these help tutorials.
- Made a mistake? Ctrl+Z undoes it (Cmd+Z on a Mac). It works in 2D and 3D.
- Not sure where to start? Open a template or an example plan and change it. See Templates and examples.
- Pick your units before you type sizes. The units button in the top bar changes them for the whole plan.
Common problems
- I cannot move around the plan
- Scroll to zoom. Hold Space and drag, drag with the middle mouse button, or press H for the Pan tool to move the view. Press Shift+F to fit the whole plan on screen. See Zoom, pan and fit.
- Dragging on the grid draws a box instead of moving the view
- With the Select tool, dragging on empty space draws a selection box. That is on purpose. Hold Space while you drag to pan instead.
- Export asks me to create an account
- Exporting, sharing a link, importing a photo and adding floors need a free account. Drawing, 3D and saving in your browser do not.
- My sizes show in feet but I want metres (or the other way round)
- Click the units button in the top bar and pick the unit you want. It changes how every size is shown and typed. Nothing is resized. See Units.
Related topics
- WallsDraw straight walls corner to corner, type exact lengths, and set thickness, height and corner join.
- RoomsDraw a whole room in one drag: rectangle, L-shape, round or any shape, at an exact size.
- Zoom, pan and fitZoom in and out, move the view around and bring the whole plan back on screen.
- Units (cm, m, ft-in)Choose metric or imperial units for the whole plan and type lengths in any format.
- Saving and your accountGuest plans save in your browser; a free account keeps every plan, with version history.
- Templates and examplesOpen a ready-made apartment, house, office or garden plan and change it to fit.
Planning a whole project?
Try it on a real plan
Free, in your browser. No sign-up needed to start.