Drawing
How to show, edit and add dimensions
SpacePlanner writes the length of every wall on the plan as you draw. You choose which face of the wall the number describes, and you can change a wall by typing a new number right on it.
For anything else, add your own dimension lines with the Dimension tool, or measure a distance with Measure. Both stay on the plan and print on exports.
Show wall lengths and pick the face
Open Settings
Click Settings (the sliders icon) in the top bar and find the Dimensions section.
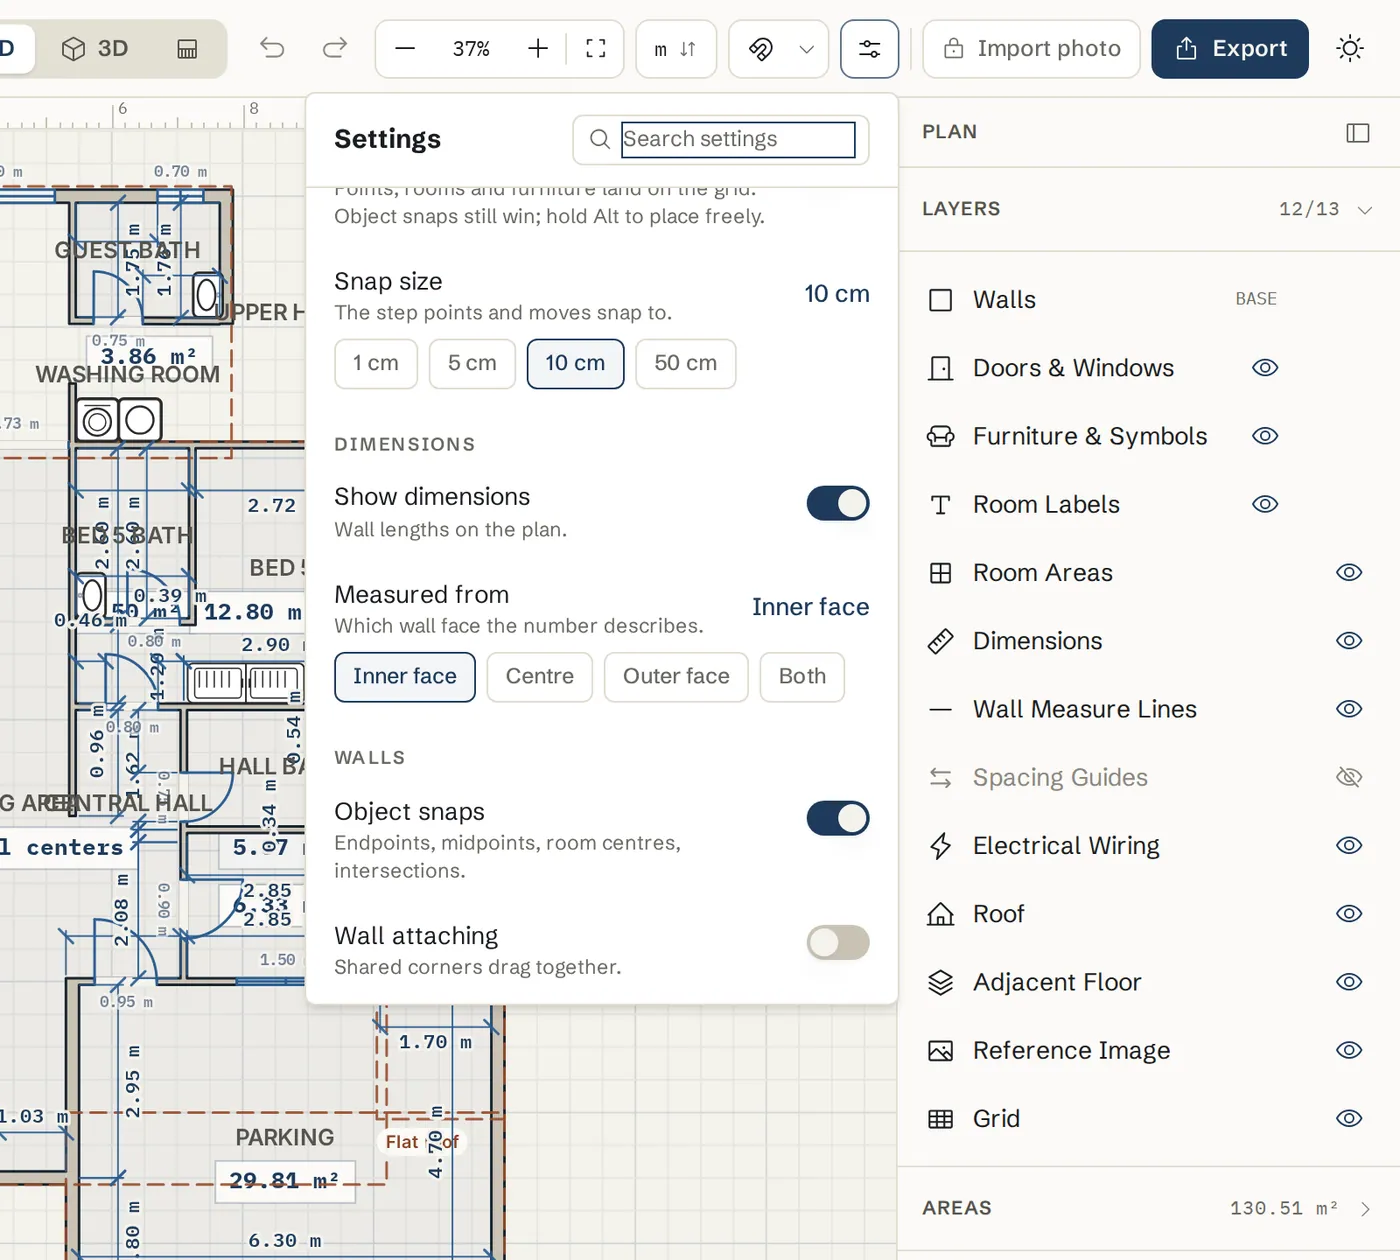
Turn on Show dimensions
Show dimensions writes the length of every wall on the plan.
Choose Measured from
Inner face: the inside length of each room, what you measure with a tape at home. Centre: the middle of the wall. Outer face: the outside of the building. Both: inner figures inside the rooms and outer figures outside.
Read the chain dimensions
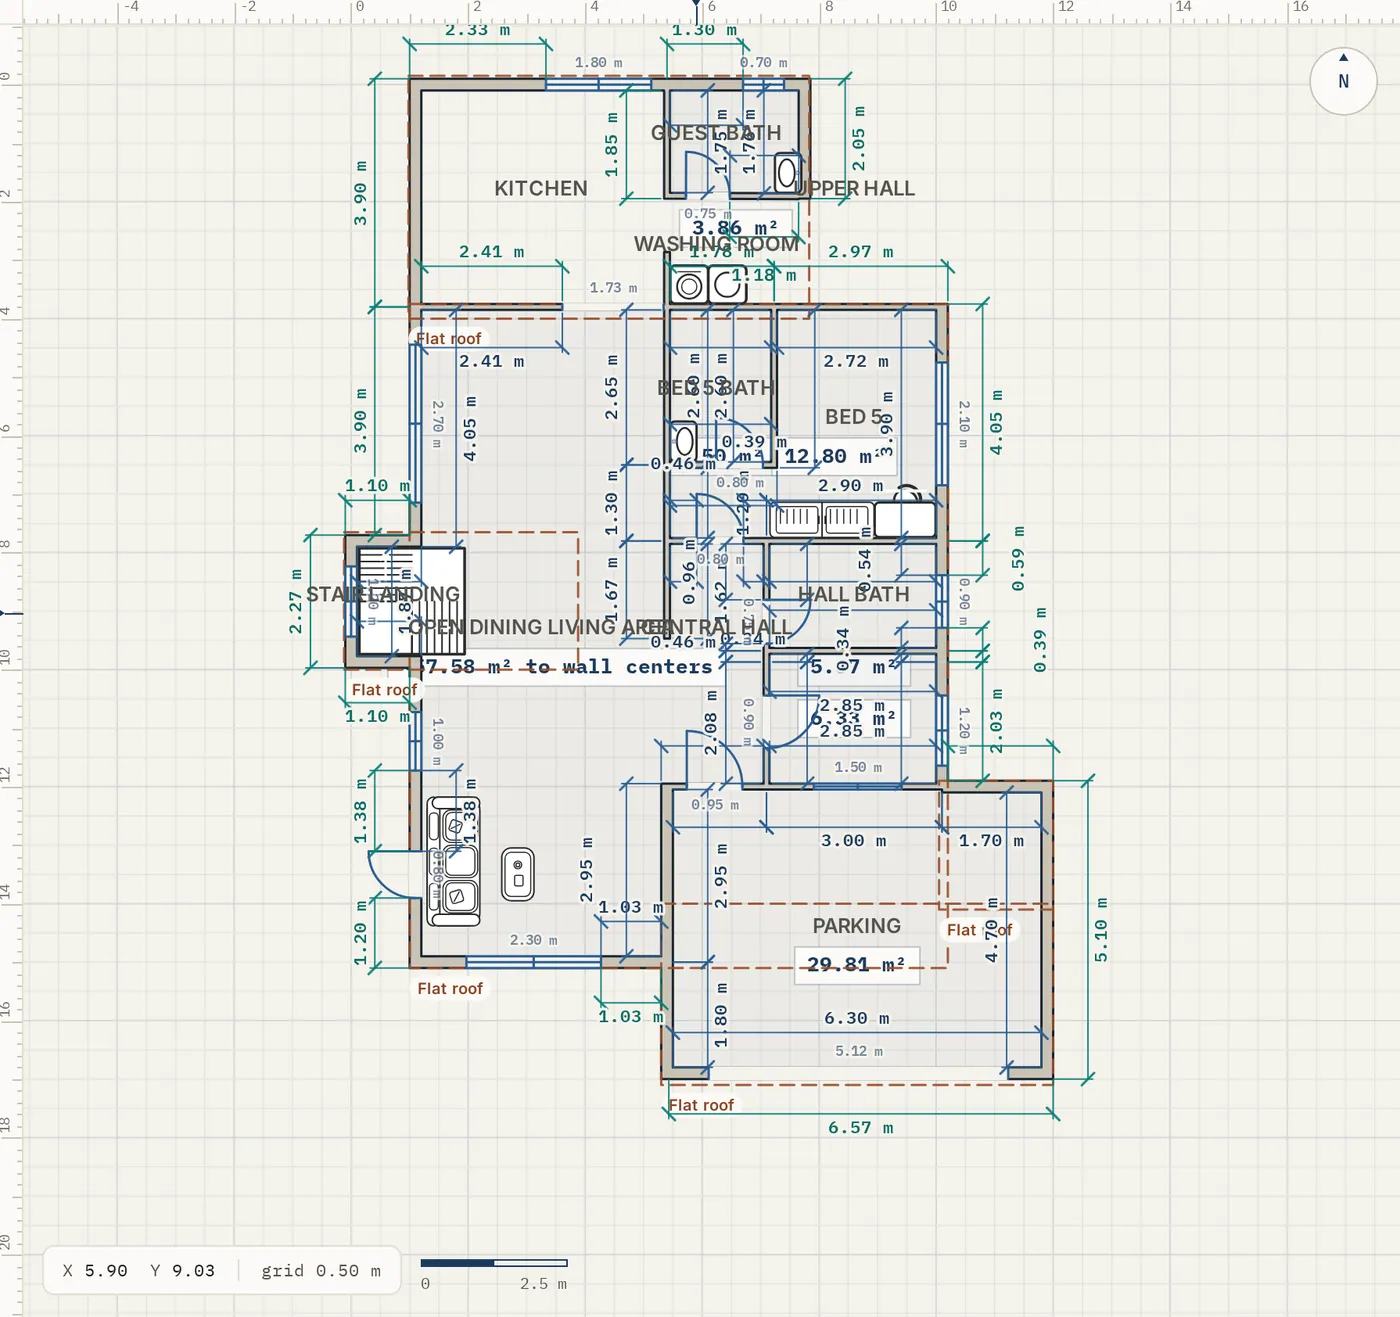
Where another wall meets a wall in a T or crosses it, the wall length is split into a chain: one figure per room. The figures add up to the whole wall.
Read the exterior dimensions
With Outer face or Both, a plain rectangular building also gets architect style dimensions outside each side: a chain row for each wall part and an overall row for the whole side.
Tell wall and opening dimensions apart
Wall dimensions and their numbers are black (light on the dark theme). Door and window dimensions are blue: the distances of a selected door or window, its width on the outside chain and the width over height label. Exports print walls in true black and openings in blue. Black & white prints everything black.
Edit a door or window size on the plan
Double-click the width or height in the blue label of a door or window, or the sill height when Sill Heights is on, type the new value and press Enter. Once the door or window is selected, a single click (or a tap on a phone) opens it too. The width grows or shrinks around the centre and never gets wider than the wall or runs into a neighbouring opening; the height and sill stop at the top of the wall. Esc cancels and Ctrl+Z undoes it.
Turn the north arrow
Click the N badge at the top right of the plan. Drag the arrow on the dial or type the North angle in degrees, for example 32. Plan up sets it back to 0. The north arrow on exports and in DXF turns with it.
Change a wall by typing its length
Double-click the figure
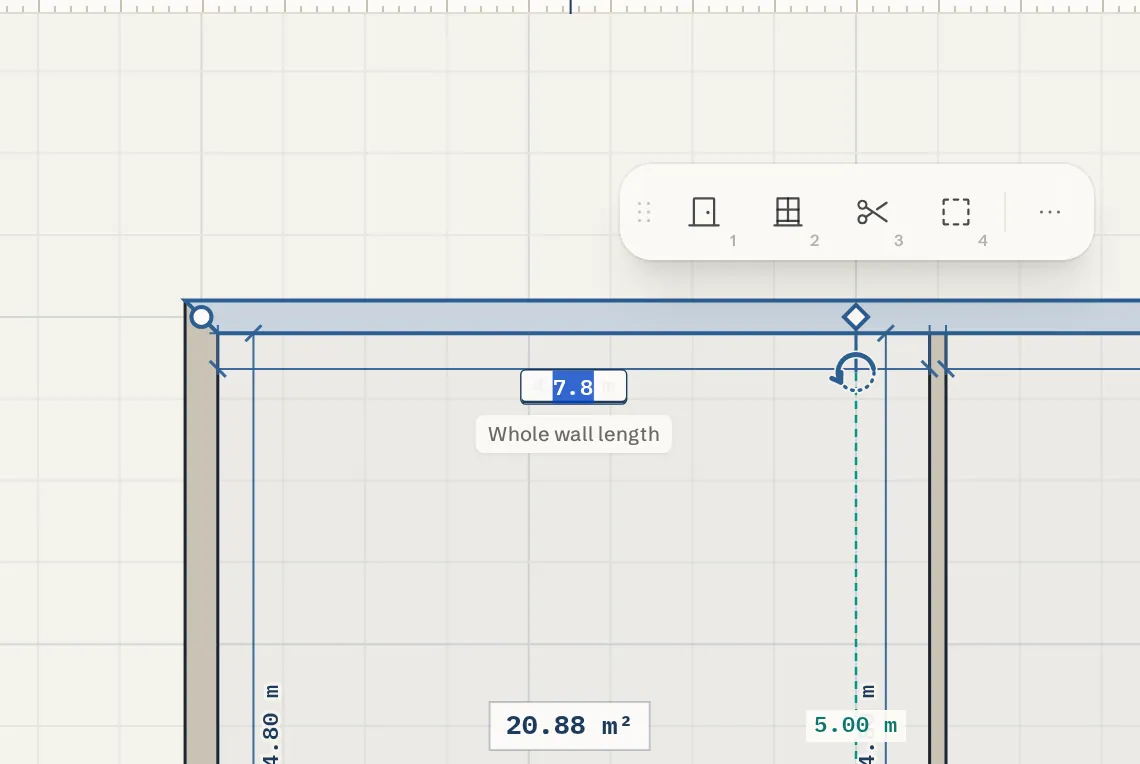
With Select (V), double-click a wall length on the plan. The figure turns into a box in the same spot. On a touch screen, tap it.
Type the new length
Type the length and press Enter. Esc cancels. The wall changes so that this very figure reads what you typed. The far end of the wall moves; the wall keeps its direction.
Use any unit
A bare number is in your plan units. You can also type 3.5m, 150cm or 10' 6". In Feet & Inches a bare number is feet, and 5 6 means 5 feet 6 inches.
Move a figure out of the way
Press on a figure and drag it sideways to move its dimension line further from the wall. A plain click on it selects the wall instead.
Edit a gap between openings
Double-click one gap
Where doors and windows split a wall length into a chain, each figure is its own gap: wall to window, window to window, window to door, door to wall. With Select (V), double-click the gap you want. Only that span lights up, and the box says This gap only.
Type the new distance
Type the distance and press Enter. The door or window slides along its wall; the wall itself never changes, and the neighbouring figures update. Between a wall end and an opening, the opening moves. Between two openings, the one nearer the start of the wall stays and the other moves. Press Alt+Enter to move the first one instead.
When it does not fit
A distance that would push the opening off the wall, onto another door or window, or across a wall meeting this one is refused and nothing changes. One Ctrl+Z undoes a gap edit. To change the whole wall, double-click the wall itself.
Add your own dimension lines
Turn on the Dimension tool
Press I, or click Dimension in the left toolbar under Measure & label.
Click two points
Click the start and the end. It snaps to corners, midpoints and crossings. The line, ticks and length are added to the plan.
Dimension a whole wall
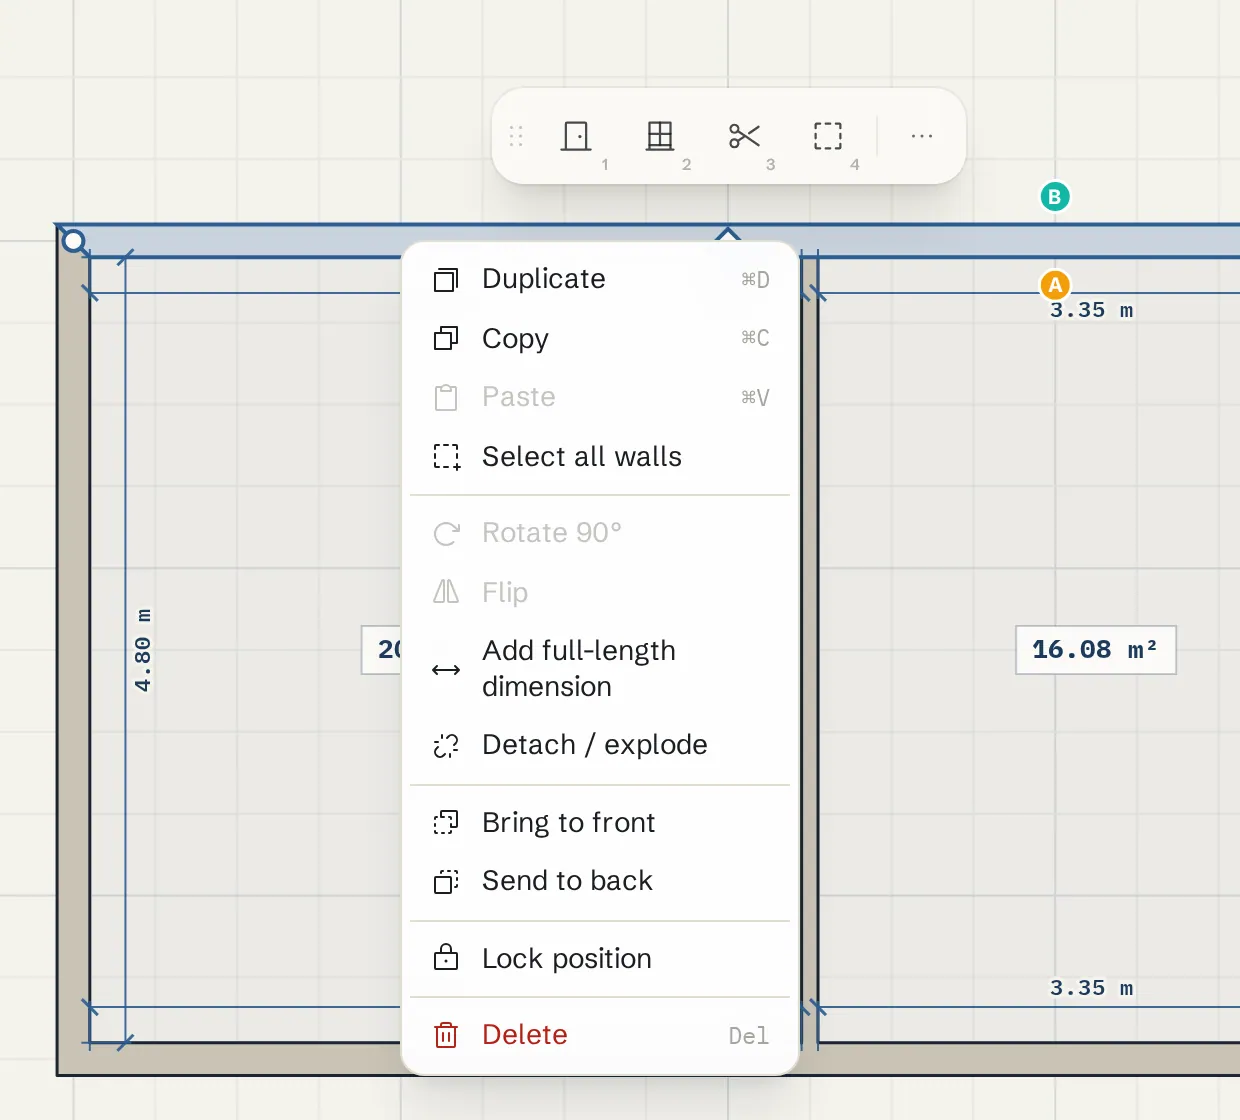
Right-click a wall and choose Add full-length dimension. It measures the wall from end to end.
Remove a dimension
Right-click the dimension and choose Remove dimension, or click it and press Delete.
Measure a distance
Turn on Measure
Press M, or click Measure in the left toolbar.
Click two points
Click a start and an end. It snaps to the nearest inner, outer or centre corner. Hold Shift to lock the angle, Alt to place freely.
Keep or remove it
The measurement stays on the plan. Select it and press Delete to remove it. Esc clears the one you are drawing.
Tips
- Measured your rooms from the inside? Use Measured from: Inner face and type the numbers you measured. Each wall fits them exactly.
- In the Layers panel, Dimensions hides every wall figure. Wall Measure Lines hides only the lines and ticks and keeps the numbers.
- On exports, the Dimensions option has its own Measure type: Inner face (room), Outer face (overall), Centerline, or Both (inside + outside).
- Dimension figures never overlap: when two would land on each other, one moves.
Common problems
- The numbers do not match what I measured
- Check Measured from. A tape measure inside a room gives the inner face; the centre line is longer by half a wall at each end. Switch to Inner face, then double-click the figure and type your measurement.
- I typed 5.6 and got 5.6 feet, not 5 feet 6 inches
- Decimal feet are not inches. Type 5 6 (a space) or 5' 6" for 5 feet 6 inches.
- Clicking near a wall grabs the dimension instead
- Only a press right on the figure text grabs it, and it only moves after a short drag. Click on the wall body itself to select the wall.
- I cannot see any dimensions
- Turn on Show dimensions in Settings, and check that Dimensions is visible in the Layers panel.
Related topics
- WallsDraw straight walls corner to corner, type exact lengths, and set thickness, height and corner join.
- Units (cm, m, ft-in)Choose metric or imperial units for the whole plan and type lengths in any format.
- Labels, notes & areasName rooms, style their labels, add notes with a leader line, and outline an area to measure it.
- Areas & area scheduleNet room areas, gross floor area per floor and building totals, on the plan, in the Areas panel and in exports.
- LayersHide or show furniture, dimensions, areas, wiring, the roof, reference images and the grid.
- Export & print (PDF)Download plans and elevations as PDF, PNG, SVG or a 3D model, true to scale on A4 to A0 paper, or save the whole plan as a SpacePlanner plan file.
Planning a whole project?
Try it on a real plan
Free, in your browser. No sign-up needed to start.